• Welcome to For E Bodies Only !

    We are a community of Plymouth Cuda and Dodge Challenger owners. Join now! Its Free!

Resto-mod Challenger

Blown71duster

Active Member
Joined
Sep 17, 2014
Messages
38
Reaction score
17
Got the battery cables ran up front to the blue sea fuse box , this gives it heavy duty protection fuses for alternator, relays etc. Also gives it a ground buss to the dash area.Ran 1/0 battery and ground cables from battery in trunk up to the starter.

IMG_0229.jpg


IMG_0227.jpg
 

Penfighter

Member
Joined
Oct 25, 2014
Messages
7
Reaction score
0
Location
South Florida
attention to details=a great ride

Put the instrument cluster and steering column in to run the wiring .

[FONT=&quot]I don’t recognize the battery mount. Whose did you use?[/FONT]
[FONT=&quot]Where did you get the header collector heat deflector?[/FONT]
[FONT=&quot]Similarly, whose gauges did you use to mount in the stock dash panel openings?[/FONT]
[FONT=&quot]Looks like you are using quality pieces and paying attention to details to make a great ride better. Yep, somebody has been doing a lot of research. Keep it up.[/FONT]
 

Blown71duster

Active Member
Joined
Sep 17, 2014
Messages
38
Reaction score
17
[FONT="]I don’t recognize the battery mount. Whose did you use?[/FONT]
[FONT="]Where did you get the header collector heat deflector?[/FONT]
[FONT="]Similarly, whose gauges did you use to mount in the stock dash panel openings?[/FONT]
[FONT="]Looks like you are using quality pieces and paying attention to details to make a great ride better. Yep, somebody has been doing a lot of research. Keep it up.[/FONT]

Thanks,
The battery Tray is made by a place called Billet proof design , it is made for the 34/78 group Optima battery.
The header heat deflector I made from aluminum with a sheet metal brake and tig welded brackets to bolt them on.
The gauges are Auto meter pro comp and are mounted in an xv motorsports dash insert
 

Blown71duster

Active Member
Joined
Sep 17, 2014
Messages
38
Reaction score
17
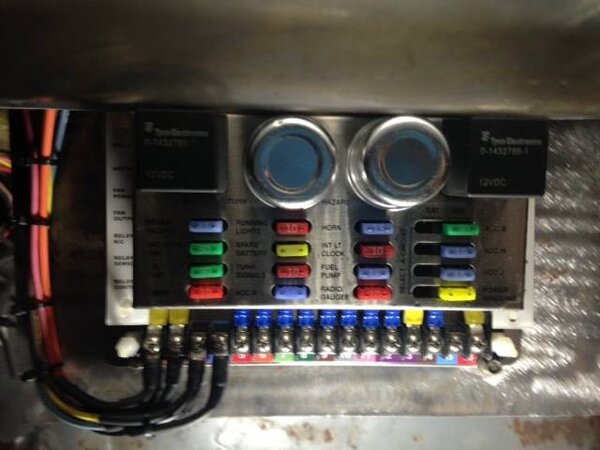
Started running wires today to the fuse panel. Engine will turn over now and have power to the Hotwire harness and ECM11924742_10153455949863654_8167939665408889517_n.jpg

11924742_10153455949863654_8167939665408889517_n.jpg
 

Blown71duster

Active Member
Joined
Sep 17, 2014
Messages
38
Reaction score
17
Test fitting the new tail lights and bezels. Also got a Fab 8 3/4 from Moser and installed the RMS street Lynx rear suspension in it

IMG_0528.jpg


IMG_0518.jpg


IMG_0530.jpg
 

Blown71duster

Active Member
Joined
Sep 17, 2014
Messages
38
Reaction score
17
Using Magnum Force Transformer suspension . Getting ready to send it out for powder coating. Really impressed with the K-frame and control arms how beefy everything is , should hold up well on the street. Putting Wilwood brakes front and back.

IMG_0533.jpg


IMG_0535.jpg


IMG_0536.jpg


IMG_0544.jpg


IMG_0541.jpg
 

Blown71duster

Active Member
Joined
Sep 17, 2014
Messages
38
Reaction score
17
Got the Front and rear suspension back from powder coating . Will be working on installing the front and bolting up to the Hemi engine.

IMG_0601.JPG


IMG_0604.JPG


IMG_0624.JPG


IMG_0625.JPG
 

Penfighter

Member
Joined
Oct 25, 2014
Messages
7
Reaction score
0
Location
South Florida
Getting close now to wearing a constant smile, eh? Doing quality work and using quality pieces always equals fun times with confidence.
Any particular reason why you chose a Jones Racing power steering pump?
 

Blown71duster

Active Member
Joined
Sep 17, 2014
Messages
38
Reaction score
17
Got the TTI exhaust all on. Had to re-weld some things, but fits really well with the RMS rear suspension .Factory R/T split tips

IMG_0702.JPG


IMG_0699.JPG


IMG_0696.JPG
 

Blown71duster

Active Member
Joined
Sep 17, 2014
Messages
38
Reaction score
17
IMG_1101.JPG
IMG_1115.JPG
IMG_1103.JPG
IMG_1105.JPG
IMG_1049.JPG
Working on installing a Vintage Air ac unit. Mounting the Drier inside , made a custom bracket to mount it to the box with a Hard line. Using Braided stainless ac lines from vintage air .
 

JpRngr

Member
Joined
Oct 5, 2016
Messages
10
Reaction score
2
Have you mocked up wheels and tires? I've got the MagnumForce front end also, and curious your front wheel tire combo.

Corey
 

JpRngr

Member
Joined
Oct 5, 2016
Messages
10
Reaction score
2
Also curious, did the a/c compressor come with the VA set-up, or is it a stock Dodge unit? Doesn't look like there's a whole lot of room where it mounts in relation to the MF motor mount on mine.
 

340challconvert

Well-Known Member
Joined
Feb 13, 2011
Messages
5,188
Reaction score
2,730
Location
Parsippany, NJ
Wow
Great work on the sheetmetal and bodywork!
Impressive high tech resto mod build!
Cool use of a modern drivetrain and electronic upgrades!
Dino2 (1).gif
 

Blown71duster

Active Member
Joined
Sep 17, 2014
Messages
38
Reaction score
17
Have not got the wheels and tires for it yet. I will be using a percy wheel fitment gauge to order the correct offset.
The ac compressor is stock for the Hemi. I used adapters on it to adapt to the vintage air fittings.
Plenty of clearance to the MF frame. Had a stock K frame to begin with , which required trimming to get the compressor to fit it.
 

Dillon

Member
Joined
May 18, 2016
Messages
24
Reaction score
5
Im thinking of putting a new hemi in my 70 challenger what yall think
 
Back
Top