• Welcome to For E Bodies Only !

    We are a community of Plymouth Cuda and Dodge Challenger owners. Join now! Its Free!

74 Cuda Restroration - From Below the Bondo to Daily Driver

Zell

Well-Known Member
Joined
Jun 14, 2017
Messages
81
Reaction score
40
Hi All - I just jumped over to FEBO a few weeks ago when I started working on a 74 Cuda.

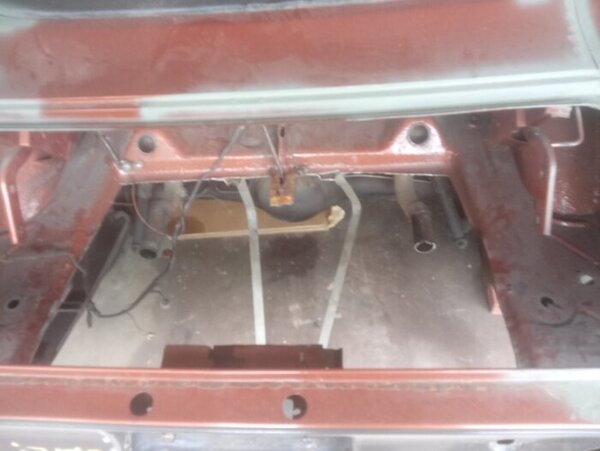
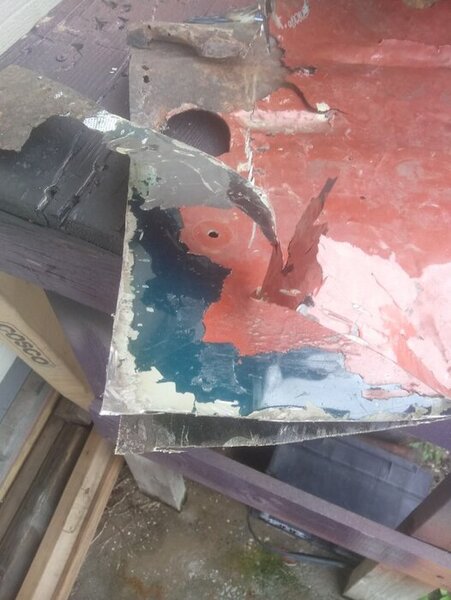
When I got the car there was a lot of bondo, fiberglass and rust that had been covering up some bigger issues. It still drove but the fuel and cooling systems are original and aren't holding up to the FL heat where I live (feels like was 108 today). As well, the wiring harness caught fire sometime before I got it and I'm sure there are plenty of other surprises I'l discover as I go through this.

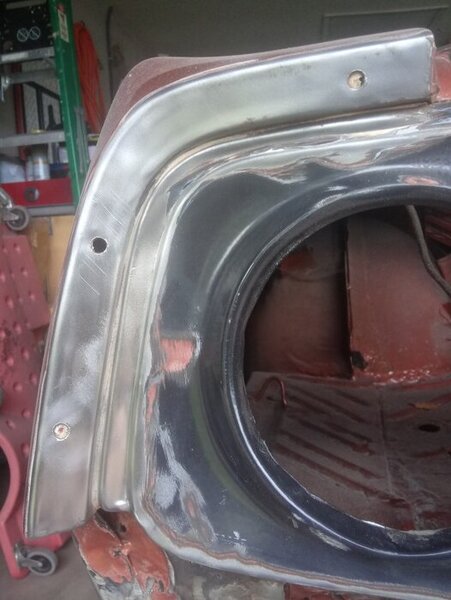
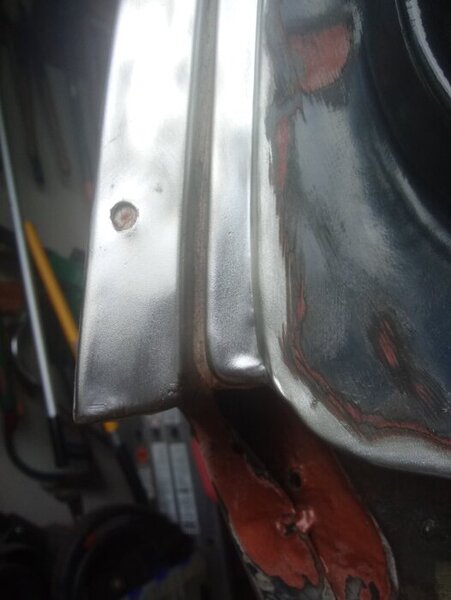
GOAL: Update this car to make it daily driver ready - I'm looking to update the wiring, fuel, cooling, ignition, suspension and more so I can cruise around town and have a good time with it. I'll also be replacing the metal and adding the chassis stiffening kit from USCT.

Looking forward to kicking this off. I've waited a long time to work on this car and special thanks to everyone that has commented on this forum and others with some really helpful info.

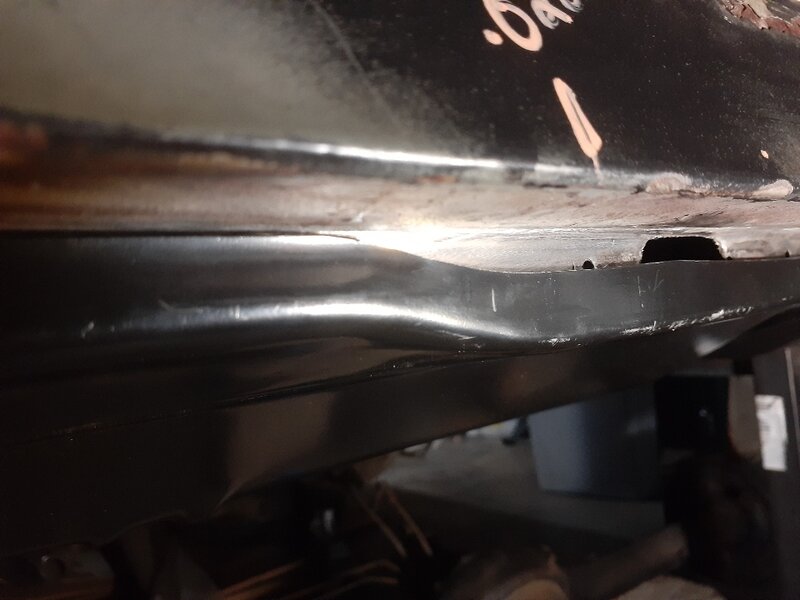
Here's what I'm starting with-

20180522_072850-jpg.jpg
 

340sport

Member
Joined
May 8, 2020
Messages
23
Reaction score
2
Welcome. Looks like a great car. Can't wait for more updates and pics.
 

fasjac

Well-Known Member
Joined
Dec 27, 2019
Messages
2,247
Reaction score
1,131
Location
Arkansas
Welcome from Little Rock! Nice Cuda, look forward to your progress.
 

Zell

Well-Known Member
Joined
Jun 14, 2017
Messages
81
Reaction score
40
So I started working at the back of the vehicle by the trunk- dropping the tank, checking the rails, etc. When I bought the car I knew there was a lot of fiber glass in the trunk and the rear rails had some plates welded over top of what I assumed was rust/rot underneath.

Dropped the tank, there was a lot of rust bubbling up and falling off. The sender was completely rusted. Now I get why the fuel gauge was not working on the dash.

20200829_133619.jpg

20200829_133657.jpg


Taking off the rear bumper and inspecting the rear cross rail. As suspected, there's a lot of fiberglass on on the rear cross rail and on the extensions.

20200829_133909.jpg
20200829_135938.jpg


I've stripped the rear panel, already more fiberglass is chipping up on the trunk floor.

20200829_133548.jpg


Check out the rear frame rails. I am going to take a grinder to these next weekend to see how much needs to be replaced.

20200829_154132.jpg


The Dirty Harry jokes were too easy with this, but as an FYI I've had a really good experience with the Harbor Freight Earthquake cordless impact gun. It made things really easy.

20200829_140239.jpg

This is what's left at the end of the day.
20200829_183358.jpg


Thanks for the comments in other threads about using AMD metal to avoid issues with fitment with other brands - I'm ordering a replacement floor pan, cross rail, extensions and possible rails (depending on the damage).
 

Zell

Well-Known Member
Joined
Jun 14, 2017
Messages
81
Reaction score
40
Hi All- Back again with an update. I got a break over the weekend and started removing the bondo/rusted metal from the trunk. Here is the latest - you can see there was something (glass mat?) layered onto the floor in the second picture.
 

Attachments

  • 20200920_141415.jpg
    20200920_141415.jpg
    32.5 KB · Views: 297
  • 20200920_141434.jpg
    20200920_141434.jpg
    48.3 KB · Views: 311

Zell

Well-Known Member
Joined
Jun 14, 2017
Messages
81
Reaction score
40
I need some HELP with the next piece! I started removing filler from the rear outside panels. I noticed that there is a gap between the outside quarter panel and the rear tail light panel. This does not seem right. Should the outer flange of the quarter panel be overlapping with the outer left tail light panel flange? Can someone with 70 - 74 check the lines on their tail light panel and let me know? This might explain why the trunk was somewhat off from the line on the quarter panels.
 

Attachments

  • 20200920_141349.jpg
    20200920_141349.jpg
    45.7 KB · Views: 288
  • 20200920_141356.jpg
    20200920_141356.jpg
    32.3 KB · Views: 291

Zell

Well-Known Member
Joined
Jun 14, 2017
Messages
81
Reaction score
40
Hi All - Update - I've found the trunk as patched in many pieces with layers of overlapping metal/bondo and I've got some work cut out ahead of me to remove areas of weld puddle:

20200924_183734.jpg


20200924_172539.jpg


I've read mixed opinions on this, but when replacing the floor pan:

1. Should I brace the car?
2. If yes, where are you all bracing the car?
3. Does the car need to be on Jack stands while i'm doing this? (I've seen mid-progress builds where some argue the suspension should be providing load on the rails/chassis, and others that say get it on jacks and get it level.

Does anyone have a good reference book for measurements? It's hard to take some measurements when lots of pieces are missing haha!
 

Zell

Well-Known Member
Joined
Jun 14, 2017
Messages
81
Reaction score
40
Hi All,

I've had the last week off from work and got time to work on the car. I got both the wheel wells taken down to metal and got the floor removed from the trunk.

image0000001.jpg

20201002_1321541.jpg


The frame rails have some rust, but I'll be sanding them down to inspect if anything needs to be repaired/replaced.
20201002_1322391.jpg
 

moparlee

Well-Known Member
Joined
Jul 25, 2011
Messages
2,919
Reaction score
1,219
Location
Mid Michigan
Looks good getting that rusty metal out of there. Be sure to check the shock tower support for any cracks where the shocks bolt up to. Known problem area on our E-bodies.
 

Zell

Well-Known Member
Joined
Jun 14, 2017
Messages
81
Reaction score
40
Thanks @moparlee I didn't know that was a common problem area. I'll give it a close inspection as well :thumbsup:
 

Zell

Well-Known Member
Joined
Jun 14, 2017
Messages
81
Reaction score
40
The last few days were really productive. I dropped the rear suspension, inspected the shock tower support and all checked out.
20201005_161940.jpg


Here are some pictures of the rear frame rails. It looks like there is some pitted rust in the rails. Some spots are thin from the rust, and there are some pin holes on the walls. There are some patches on the walls where a plate was welded over what were likely much larger holes. However, the rail feels very sturdy.

20201002_132226.jpg20201002_132239.jpg

Does any one have a rule of thumb for evaluating when to patch a wall, cut a section of the rail/replace or replace the whole rail? I've also looked into using the Safe-T Caps as well so as not to worry about screwing up the alignment.
 

70chall440

Well-Known Member
Joined
Dec 11, 2010
Messages
1,260
Reaction score
976
Location
Western Washington
I have patched many frames, if the damage is isolated then cut it out, make a patch and weld it in. I usually butt weld it is so I can grind it smooth. So long as you get good penetration and completely fill the gap, you are good.

As to the bracing, I know some swear you have to but I never have and have never had any issues, I think its more about how much you are removing. Doing what you seem to be doing, I think you will be ok but if you are nervous then brace it up, can't hurt.
 

Zell

Well-Known Member
Joined
Jun 14, 2017
Messages
81
Reaction score
40
Back with an update after several months of having to take care of some other items. @70chall440 thanks for the feedback a few months back.

I patched a few spots, used a metal prep and then sprayed the frame rails with an epoxy primer. Then I put frail rail caps overtop the original rails. They fit okay and I was able to keep the seem weld tucked under the lip for the most part.


Test fitting the frame rail caps.
20210403_164523.jpg

Checking the alignment between both rails.

20210403_164758.jpg

I put a bar between both of the mounts then measured the distance from the rear cross rail to ensure it's the same distance along with the relative positions of the rear mounts.
20210403_165004.jpg

Clamping the passenger side cap before welding.


20210414_205017.jpg

Welding the upper lip of the cap to the frame rail. Other than the ends I kept the seem tucked under the flange that folds over and mounts to the floor pan.
20210414_222421.jpg

20210414_222454.jpg
 

Zell

Well-Known Member
Joined
Jun 14, 2017
Messages
81
Reaction score
40
Thanks guys - much appreciated. I continued today and took some measurements on the rear frame panel. I'm posting in here in case anyone reading this thread needs measurements (I'm on the hunt for measurements for the rear tail light panel right now).

I also welded up a brace made of some 2"x2" square tubing to hold the frame rails in place. Next step is to remove the rear frame rail panel and clean up the bottom area of the tail light panel.

20210417_180642.jpg
20210417_193713.jpg
 

Zell

Well-Known Member
Joined
Jun 14, 2017
Messages
81
Reaction score
40
Back with an update. I had a few hours here and there during the week. I was able to remove the rear frame rail panel and get a test fit for the floor pan. There's a lot of minor adjustments and work that needs to be done on the tail light panel to make everything fit just right but the AMD full piece floor pan fit really well.

Rear frame rail panel removed.
20210422_221914.jpg

Test fit of the new floor pan.
20210422_202026.jpg


The floor fit between the trunk extensions really well.
20210422_202238.jpg

There were some small gaps between the rear lip of the floor pan and the back tail light panel. There were some previous patches that will get removed and cleaned up.
20210422_203959.jpg
 

fasjac

Well-Known Member
Joined
Dec 27, 2019
Messages
2,247
Reaction score
1,131
Location
Arkansas
Good work. I don’t know if any of the factory rear tail panels were right on. For that matter, the QC just wasn’t a top priority at any of the plants.
 

Zell

Well-Known Member
Joined
Jun 14, 2017
Messages
81
Reaction score
40
Thanks @fasjac that's good to know. I noticed the shock mount brace was off by over 1/2" on one side when I removed the floor pan!

Today I got the patches/welds puddles (shown in the previous post) cleaned up. The floor panel fits really nice and sits flush with the tail light panel in the center. However the bottom inch or so is missing from the tail light panel so there isn't much overlap for welding them together.

Now my next step is to reweld a strip to the bottom of the tail light panel to replace everything that was patched or removed.

Lower lip of the tail light panel after removing patches/clean up.
20210423_175615.jpg

Rear lip of the floor pan sitting flush with the bottom tail light panel. You can see holes where some new metal needs to be added.

20210423_235640.jpg
 

Attachments

  • 20210423_235654.jpg
    20210423_235654.jpg
    43.2 KB · Views: 186
Back
Top