• Welcome to For E Bodies Only !

    We are a community of Plymouth Cuda and Dodge Challenger owners. Join now! Its Free!

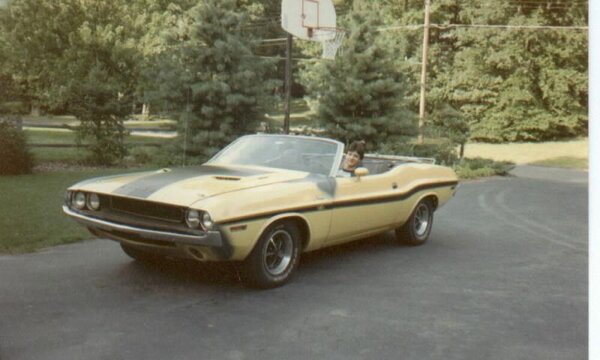
1970 A-66 Challenger Convertible

340challconvert

Well-Known Member
Joined
Feb 13, 2011
Messages
5,469
Reaction score
2,936
Location
Parsippany, NJ
I am finally starting to work on my 70 Challenger 340 convertible. Has been off the road since 1984, sitting in my garage, and was periodically started over that time. I retired and have started to put some time and effort into cleaning it up, repair and replace the needed mechanical s, and complete some needed body work. Initially, I am not looking to do a high dollar, ground up restoration, but to address various areas while getting the car running and more functional while addressing any mechanical and body issues the car may have.

Process so far:
- removed interior rugs, door panels to assess state of sheet metal, floors, inside quarters
- removing front end sheet metal
- rebuilding brakes with new calipers, rotors w new bearings, brake hoses, master cyl, and brake booster.

Feels really good to finally work on my car . This will be a slow process

Dino fr driver view 8-15.jpg


Dino rt side view 8-15.jpg


Dino rt rear quarter 8-15 (2).jpg


Dino rt rear quarter 8-15.jpg


Dino left quarter w filler.jpg
 
70 Challenger A-66

- Driver's side fender is NOS I bought in the 70's. Sadly, I sold the original years ago. Needs to be cleaned up w surface rust
- Removed front end, surface rust on side cowl. Firewall looks solid
- Purchased Centric rotors and calipers, Raybestos master cyl., reproduction back plate shield, new factory style brake hoses, Wearever brake booster, new Goodmark upper control arms w new ball joints, and Timken US made wheel bearings-so far.
- Factory disc brakes in current condition

front end sheet metal removed.jpg


front end sheet metal removed 2.jpg


left door jam.jpg


left frame behind disc brake.jpg


left frame closeup.jpg


left disc brake and frame.jpg


left upper control arm.jpg


rt side headlite bucket original paint.jpg
 
Interesting Notes:
- factory black out spray areas behind the grill and cowl area
- view of what I believe to be the factory undercoating in the wheel well area
- amazing that the paint on the frame rails still has a gloss after cleanup
 
Looks like a fun retirement project there.
Good luck and keep the updates coming.
Additional knowledge is just a click away now.

Mike
 
Black out behind the grill area and upper cowl are correct, heavy undercoat is also. shiny paint on frame rail is A good thing! take pictures of the black out areas so you can duplicate it later. rhino liner truck bed liner is close to the factory treatment for the wheel wells.
 
Thank you for your thoughts.
I wanted to just clean up the wheel wells and respray with something that looked factory. I was thinking about cleaning up the wheel well surface rust with a wire wheel, using rust bullet inhibitor (especially in the upper control arm area) then spraying with undercoating like you are suggesting. Trying to keep it clean and neat
 
Last edited:
floors inside

Floors appear to have mostly surface rust, one spot only, looks like it needs a small weld. I had to work at making the small hole in the floor, directly over the frame rail, not visible from underneath the car. I will be looking at adding some rust neutralizer into the frame rail underneath the car as well as inside the doors

Fr  Rear floor Dino.jpg


Fr rt floor 2 Dino.jpg


Rear back floor Dino.jpg


Rt door inside.jpg
 
Rt side original never removed fender taken off

Right side fender removed; all original-never been off of car

-Tar like sealer on the L bracket holding top of fender to cowl still intact
-Spongy type gasket material on top of inner fender where fender rests on top: What is this stuff? What would be a better material here when I re-install the fender?

Really like the acorns coming out of the cowl drain!

Thank you all for your positive comments

Rt side cowl top.jpg


Rt side cowl top 2.jpg


Rt side frame rail inner fender.jpg


Rt side, side cowl.jpg


Rt side cowl fender shield.jpg


Rt side top of inner fender.jpg
 
Last edited:
Love it! You lucky dog!!

Thanks Matt
I remember the work you posted when you were working on your 71 Challenger convertible earlier.
You did a great job on that cowl repair when you found the rust. You never know what you find when tearing down!
 
Control Arms and Reman Brake booster

Was very careful in ordering parts. Wanted good quality and close to stock as possible.

Ordered Goodmark upper C Arms-thought they looked good and close to stock looking (GMK2130972621 L&R)

Brake booster is a Wearever remanufactured unit (keeping original for future rebuild) (Part No 54-73701)

Lft upper control arm top.jpg


Lft upper control arm side.jpg


PB Booster.jpg


PB Booster 2.jpg
 
Thanks for all the great pics! Would be great if you can keep as much of the factory original as possible. Just curious, why did you replace the upper A-arms rather than just re-bushing the originals?
 
I picked mine up in Ft. Lee, NJ in 1984. I lived in CT at the time and almost did not make it over the GW and through South Bronx with the car. Was in bad shape. Live in Michigan now outside of Detroit. Keep going on your car and keep sending pics since I still have to put mine together and forgot where to put many of the parts!!
 
Back
Top