• Welcome to For E Bodies Only !

    We are a community of Plymouth Cuda and Dodge Challenger owners. Join now! Its Free!

1970 A-66 Challenger Convertible

DetMatt1

Well-Known Member
Joined
May 13, 2009
Messages
7,867
Reaction score
2,075
Location
Metro Detroit
I picked mine up in Ft. Lee, NJ in 1984. I lived in CT at the time and almost did not make it over the GW and through South Bronx with the car. Was in bad shape. Live in Michigan now outside of Detroit. Keep going on your car and keep sending pics since I still have to put mine together and forgot where to put many of the parts!!
So we may be neighbors. How long have you been in the Detroit area? I live in Rochester and have a shop in Royal Oak.
 

340challconvert

Well-Known Member
Joined
Feb 13, 2011
Messages
5,207
Reaction score
2,749
Location
Parsippany, NJ
Hey Doubleyellow
I bought my car in 1980 in Tom's River. NJ. Had to tow it home in northern NJ and got it running.

Used it as daily transportation till 1984 and just stored it, taking off the road at that time. I did attend the Hemi Owners Association Meet in 1980 with the car. Was in much better shape then.

I am marking and bagging and taking pics as I go along so I do not have a problem w reassembly hopefully! I am not fully tearing it down all at once and am doing individual tasks at a time.

Your car looks really great. Good luck with the assembly. What type of paint did you use on the paint job? Single stage? Clearcoat? I have a long way to get the body in the same shape as yours.

Phil
 

340challconvert

Well-Known Member
Joined
Feb 13, 2011
Messages
5,207
Reaction score
2,749
Location
Parsippany, NJ
Thanks for all the great pics! Would be great if you can keep as much of the factory original as possible. Just curious, why did you replace the upper A-arms rather than just re-bushing the originals?

I always struggle with this. I prefer to keep the car as original as possible. I debated on using the originals, but the amount of work and cost to purchase new joints and bushings and the labor involved, the cost difference was not that great. I also looked at 46 year old UCA's and felt better about using new parts on the suspension and brakes. I'm at a point where I would like to get it running and on the road while working on it, a little at a time. I will keep the originals boxed, labeled and stored.
 

340challconvert

Well-Known Member
Joined
Feb 13, 2011
Messages
5,207
Reaction score
2,749
Location
Parsippany, NJ
Fenders off vehicle

Fenders removed, everything looks good except for dirt and surface rust.
Clearly see the blackout treatment from the factory

underside hood.jpg


rt side frame rail.jpg


front end w no fenders.jpg
 

340challconvert

Well-Known Member
Joined
Feb 13, 2011
Messages
5,207
Reaction score
2,749
Location
Parsippany, NJ
further documenation-teardown

Condition of inner fenders, firewall, brake booster/master brake cyl

Master brake cyl leaking onto booster.
No visible rot
will check date on wiper motor and hood support brace-thinking they are originals

wiper motor.jpg


rt.side innter fender.jpg


master brake w booster.jpg


lft firewall.jpg


MVC-040F.jpg


rt side radiator support.jpg
 

doubleyellow

Well-Known Member
Joined
Aug 3, 2015
Messages
331
Reaction score
89
Location
Metro Detroit
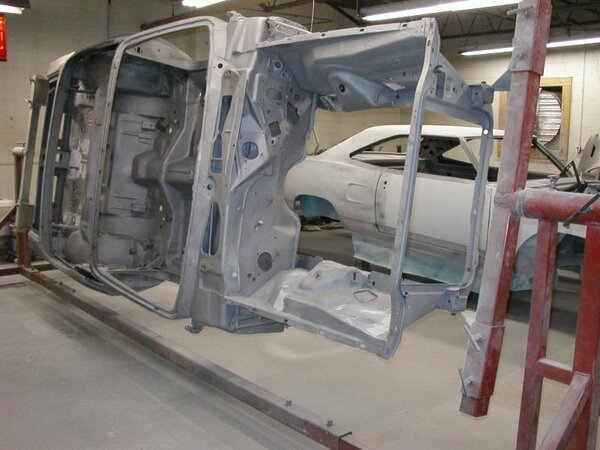
Had mine done at Cummins Restoration in Grand Haven, MI. Only Mopars done there. My car was in an accident in New Jersey before 1980. I had to have the front right frame rail repositioned, door replaced, both fenders were already replaced in the 70's. Still most of the sheet metal original luckily.

Yours looks amazing for being on East Coast for so long.

Paint I think is 2-part Polyurethane with clear coats. Epoxy primer throughout (most important).P5230003.jpg

P5230003.jpg
 

340challconvert

Well-Known Member
Joined
Feb 13, 2011
Messages
5,207
Reaction score
2,749
Location
Parsippany, NJ
Thanks for your thoughts all. I am really surprised at how solid the chassis is. The only really bad areas appear to small areas on the the rear quarters at the bottom in back of the rear wheels and the trunk floor is a mess. The frame is really solid, firewall is good, as well as the inner fenders. I am cleaning up the wheel wells and attempting to remove the factory undercoating in the outside of the inner fenders.
 
Last edited:

340challconvert

Well-Known Member
Joined
Feb 13, 2011
Messages
5,207
Reaction score
2,749
Location
Parsippany, NJ
Clean up of the wheel wells.

Was looking to remove the dirt and factory undercoating used in the front wheel wells. You can clearly see the pattern of how the factory sprayed the coating. I started using some sharp scrapers and can of brake clean.

The undercoating came off relatively easy with some elbow grease. I would scrape an area, then spray with the brake clean and the metal cleaned right up. Seems to be working.

Also found some red paint residue on the surface of the disc brake spindle and steering arm (was this factory?)

Anyway cleanup is progressing slowly, but this is how it is cleaning up!

lft inner fender bottom clean.jpg


lft inner fender bottom close.jpg


lft inner fender bottom fr.jpg


lft inner fender center.jpg


lft inner fender front.jpg


lft inner fender UCA.jpg


lft inner fender bk.jpg
 
Last edited:

340challconvert

Well-Known Member
Joined
Feb 13, 2011
Messages
5,207
Reaction score
2,749
Location
Parsippany, NJ
What the A66 convertible looked like in 1980

Pictures I found of my car at a Mopar meet I attended in the early 1980's.

Challenger Pics Dino 1980 2.jpg


Challenger Pics Dino  1980.jpg


Challenger pics Dino 1980s.jpg


Challenger Dino 1980's 4.jpg
 
Last edited:

340challconvert

Well-Known Member
Joined
Feb 13, 2011
Messages
5,207
Reaction score
2,749
Location
Parsippany, NJ
Car at the Hemi Owners Meet in 1981

Picture of the Challenger at the Hemi Owners Association Meet in 1981, I think it was in Massachusetts

Dino hemi mt 1981 2.jpg


Dino hemi mt 1981.jpg
 

340challconvert

Well-Known Member
Joined
Feb 13, 2011
Messages
5,207
Reaction score
2,749
Location
Parsippany, NJ
Clean up of the wheel wells and inner fender left side

Used a dremel tool with a scraper to scrape off the factory undercoating. Worked pretty well considering without a lot of effort.
then cleaned up with brake cleaner to remove remaining residue

Original paint is in amazing shape considering the age
Have to do this by hand since I do not have media blasting equipment.

Almost too nice to respray with undercoating.
Need to address the surface rust areas now.

lft inner fender bottom clean.jpg


lft inner fender outside clean.jpg


lft side cowl clean.jpg


lft side inner fender outside clean 2.jpg
 
Last edited:

moparleo

Well-Known Member
Joined
Oct 17, 2011
Messages
6,946
Reaction score
1,742
Location
So. Cal. Riverside area Moreno Valley
Looks like the undercoating did its job. Re apply some sort of protective coating like Lizard Skin or something equivalent. Protects the body, kills the noise, blocks out the heat and cold. Keep going. Looking good.
 

resq302

Well-Known Member
Joined
Aug 20, 2013
Messages
111
Reaction score
11
Don't know how I missed this thread for the past month. I see you aren't that far away from me. If you need any help, I restored my Mom's 70 challenger convertible. Please PM me and let me know if I can be of any help.

Very nice job restoring it. Keep up the great work with documenting everything ! Thats what I did for my Dad's 69 GTX convertible that I finished up last year for him. http://www.forbbodiesonly.com/moparforum/showthread.php?67715-Bringing-it-back-to-factory-specs
 
Last edited:

340challconvert

Well-Known Member
Joined
Feb 13, 2011
Messages
5,207
Reaction score
2,749
Location
Parsippany, NJ
Your GTX looks great on FBBO. Thanks for the encouragement. I just about finished cleaning the left wheel well down to original paint and or to bare metal. It is just about ready for rust proofing, epoxy prime and undercoating. I'm looking at Eastw00d for materials. It is definately a labor of love. New UCArms, rotors/bearings and pad, then moving on to the right side.
 

resq302

Well-Known Member
Joined
Aug 20, 2013
Messages
111
Reaction score
11
I got a undercoating spray gun from Eastwood for I think around $10 if I remember correctly. I then went to Boonton Auto Parts on Myrtle Ave and got some 3M undercoating in the quart size bottle that the spray gun screwed onto.

Did you make a cardboard template of the undercoating pattern so you could put it back in the same areas?
 

340challconvert

Well-Known Member
Joined
Feb 13, 2011
Messages
5,207
Reaction score
2,749
Location
Parsippany, NJ
I got a undercoating spray gun from Eastwood for I think around $10 if I remember correctly. I then went to Boonton Auto Parts on Myrtle Ave and got some 3M undercoating in the quart size bottle that the spray gun screwed onto.

Did you make a cardboard template of the undercoating pattern so you could put it back in the same areas?
That is a good idea. Have taken a number of pictures of other cars showing how the wheel wells should look.
 

340challconvert

Well-Known Member
Joined
Feb 13, 2011
Messages
5,207
Reaction score
2,749
Location
Parsippany, NJ
Update on tear down on A66 Challenger
-Completed clean up of driver side wheel well, waiting to remove complete the rebuild of the disc brake and ball joints on this side.

-Pulled out the interior to clean up the floor pan. sanding down to bare metal. Overall solid, some small weld patch work needed
under driver's side foot well, but pan is cleaning up nicely. Shows mostly solid, even when I strongly poke and prod.

- Looks like I provided living space for some rodents during the long storage: driver's side under rear seat had a lot of rodent stuff. Floor shows more surface rust in this area.

- With back seat out, the convertible top pump and sheet metal exposed leading to trunk. Original well cover is there but in bad shape. Also have original boot cover, intact with broken clips. Again sheet metal appears to have only surface rust. Rear floor after sanding is starting to look good.

lft side under driv seat.JPG


left side floor back stripped.JPG


lft side under bk seat.JPG


lft side floor under rear seat.JPG
 
Back
Top