TURBOCAL
New Member
What's the best location to mount an adjustable brake proportioning valve on a 1970 challenger?
 to FEBO from New Jersey
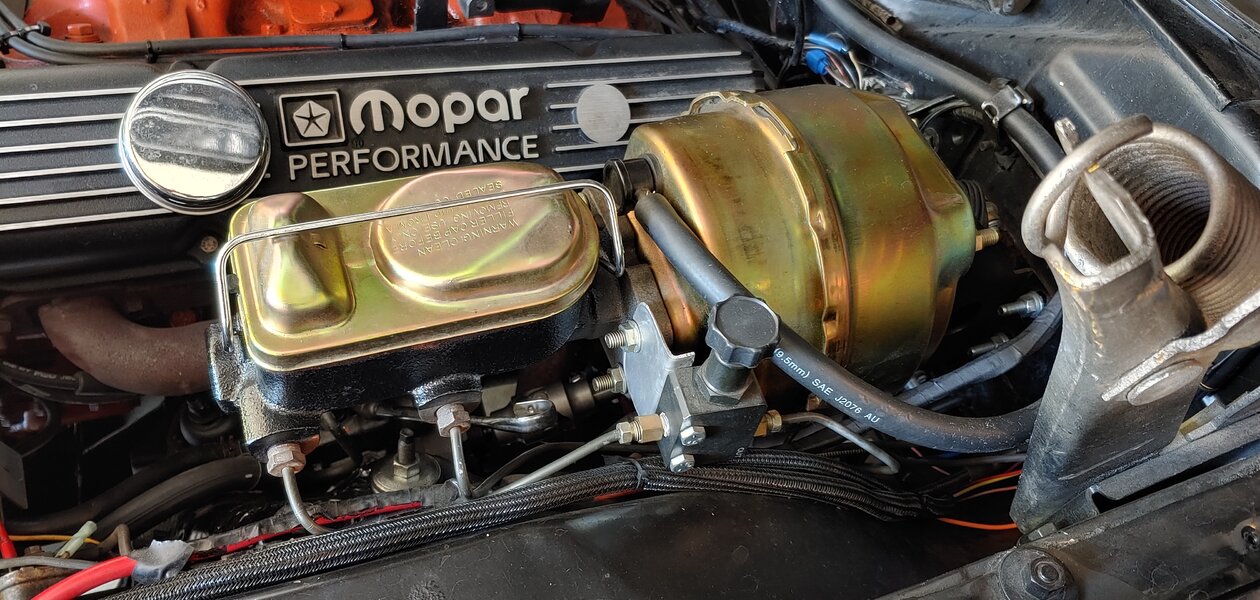
Hi rklein71, it looks as if you have an adjustable prop valve in addition to the prop valve built into the distribution block? Did you “gut” the block, or running both? Curious to know if this combo works well?This is where I put mine, below master cylinder to kind of hide it but still accessible from the top. I made a bracket to stabilize the proportioning valve after the picture was taken.
Rod
View attachment 77859
I did not gut the internals of the distribution block. Honestly, I have not had a chance to really play with the proportioning valve I installed. I basically have it wide open for now so it isn't functioning. I wish I could be more help. I have been building a shop the last six months and just have too busy to really work on my Barracuda.Hi rklein71, it looks as if you have an adjustable prop valve in addition to the prop valve built into the distribution block? Did you “gut” the block, or running both? Curious to know if this combo works well?
I’ve got rear brake lock-up after changing to a modern aluminum Mopar master cylinder (same bore as original) and braided brake lines. Looking to simply add the adjustable valve without gutting the stock valve.
Thanks!
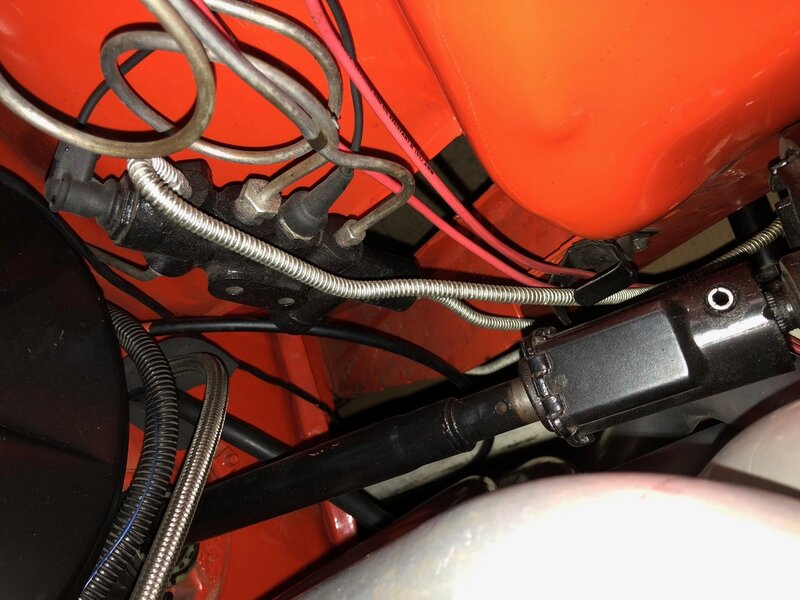
Hi DaveBob, is your factory combination valve completely functional - nothing gutted or disabled - and you added the adjustable valve to that? In other words, functional fixed valve AND adjustable valve? Thanks!The factory proportioning valve is on a frame rail, below and forward of the driver's seat. I replumbed the system, as part of a four wheel disc conversion, and used a solid line front to back to eliminate the valve and replace it with line clamp. I then added an adjustable proportioning valve below the master cylinder, thanks to the design of the master cylinder I used. The Baer master cylinder has a mounting location for their valve, just below the cylinder. Then, the trick is custom fabricating the lines that fit, don't leak and tie the new and old parts together.
View attachment 77948
View attachment 77949
View attachment 77950