
Thanks @BriceRoad the original color was Sienna but it's had a few close repaints. I'm going for Vitamin C orange. I've thought about burnt orange as well.Great job! By the way I really like the original color. Are you going to go with a different color?
You are using an out of date browser. It may not display this or other websites correctly.
You should upgrade or use an alternative browser.
You should upgrade or use an alternative browser.
74 Cuda Restroration - From Below the Bondo to Daily Driver
- Thread starter Zell
- Start date
Finally got the tank mounts welded to the floor pan then started in on the floor pan and frame rail extension. The rear of the floor pan/frame rail extension are in and the floor pan is welded half way up the rails.
Tank mount straps finally in. I welded from the mount to the floor pan.

Drilling out the holes for the rear frame rail panel just before final reassembly.

Welding in the frame rail panel and floor pan to the tail light panel and the frame rails:


Tank mount straps finally in. I welded from the mount to the floor pan.
Drilling out the holes for the rear frame rail panel just before final reassembly.
Welding in the frame rail panel and floor pan to the tail light panel and the frame rails:
moparlee
Well-Known Member
Very nice workFinally got the tank mounts welded to the floor pan then started in on the floor pan and frame rail extension. The rear of the floor pan/frame rail extension are in and the floor pan is welded half way up the rails.
Tank mount straps finally in. I welded from the mount to the floor pan.
View attachment 83048
Drilling out the holes for the rear frame rail panel just before final reassembly.
View attachment 83049
Welding in the frame rail panel and floor pan to the tail light panel and the frame rails:
View attachment 83051
View attachment 83052
View attachment 83050
 . You have those spot welds dialed in perfectly!.
 I was happy with the way those turned out - I'm a tall guy and had to fold like a pretzel to get some of those in the far corner (one arm in the trunk, the other through the tail light panel).
Today the rest of the floor pan was welded in. I cut the inner fender wells out so that I use clamps to hold the floor pan flat to the rails.
Next up - inner fender wells and the quarter panels.
Cutting the inner fender wells and clamping the pan from the sides.

The welds connecting the floor pan to the middle floor pan. I used self-tapping screws to hold the two floor pans together and pull the surfaces together.

Floor pan welded in - I figured I would grind down the welds while more metal is on the way.

Next up - inner fender wells and the quarter panels.
Cutting the inner fender wells and clamping the pan from the sides.
The welds connecting the floor pan to the middle floor pan. I used self-tapping screws to hold the two floor pans together and pull the surfaces together.
Floor pan welded in - I figured I would grind down the welds while more metal is on the way.
Hi all - back again with an update. New metal has arrived
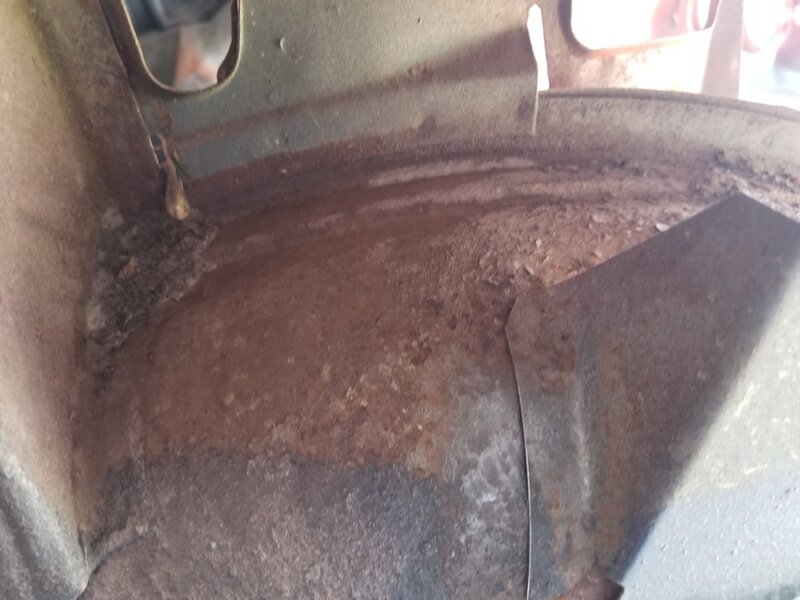
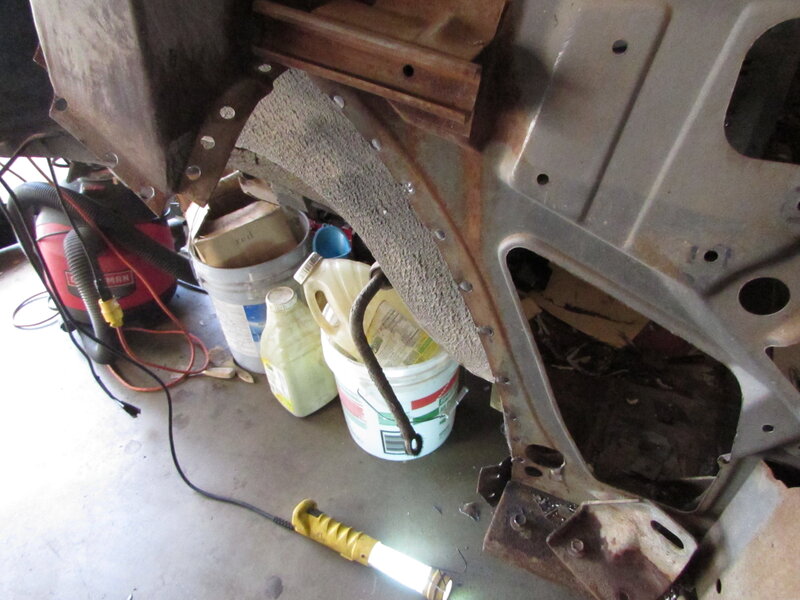
The quarter panel had a lower end patch on it that was removed this weekend - next up is to remove the outer wheel well and trunk extension. After removing the undercoating it looks like there was a new fender well added/spliced over the old. This is all coming out.
Any suggestions on the best order to remove these items? Any bracing recommended?
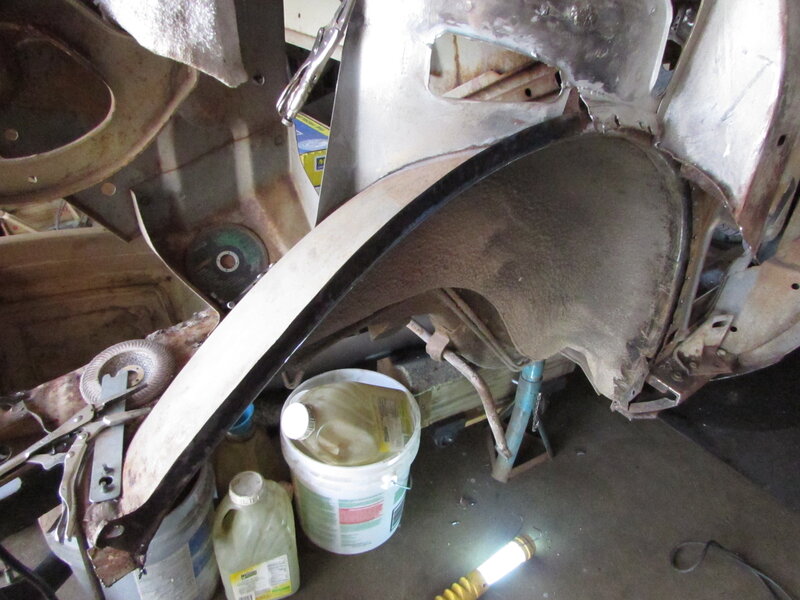
Quarter partially removed.

Patch on the new fender well over the old.


The quarter panel had a lower end patch on it that was removed this weekend - next up is to remove the outer wheel well and trunk extension. After removing the undercoating it looks like there was a new fender well added/spliced over the old. This is all coming out.
Any suggestions on the best order to remove these items? Any bracing recommended?
Quarter partially removed.
Patch on the new fender well over the old.
Attachments
heminut
Well-Known Member
Wow, that was a nasty patch job!
@heminut right! When I checked the car I went tapping around and heard metal in the wheel wells, I just didn't realize it was layered under the undercoating 
Looking at the patches together, I think the person who patched it didn't want to remove the welds from the inner and outer wheelhouse. It looks like the only way to get those out is to remove the window subframe and the outer supports.


Looking at the patches together, I think the person who patched it didn't want to remove the welds from the inner and outer wheelhouse. It looks like the only way to get those out is to remove the window subframe and the outer supports.
mmissile
Well-Known Member
Nice work. I like the original color, when fresh.
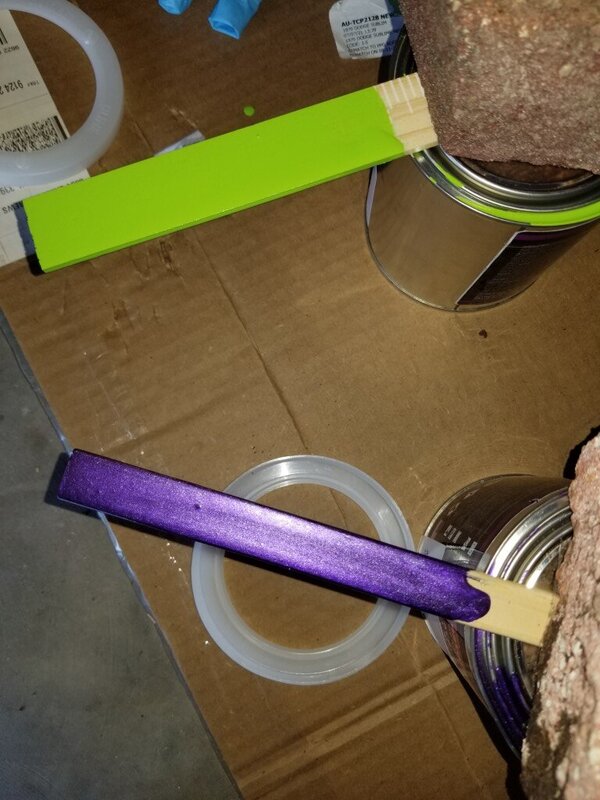
Thanks @mmissile - I've been playing around with some other colors. On Friday the sublime and plum crazy sample quarts came in and they are looking good!
It's still a toss up if I'll go with this or the Vitamin C - but this is a good problem to have IMO.
It's still a toss up if I'll go with this or the Vitamin C - but this is a good problem to have IMO.
Attachments
mmissile
Well-Known Member
I'd go Vit-C, before those. Too common on repaints.
Enjoy the day!!
Mike.
Enjoy the day!!
Mike.
70chall440
Well-Known Member
My Challenger is Hemi orange but was originally Vit C (go Mango), if I ever repaint it I would probably go back to it. I painted my 73 Cuda lime green (not the original Mopar version but close) and my 10 Challenger RT is Plumb Crazy. I like them all but I am going to do my 70 RR in silver/grey or my 71 Charger in a dark blue (or might leave it looking like a Roadkill car).
I will say this, orange or purple is easier to paint than the lime green IMO.
I will say this, orange or purple is easier to paint than the lime green IMO.
@70chall440 thanks! I got a quart of Vitamin C a few months ago and sprayed the truck just to see how it looked just before I put the floor in (pics in in this thread). IMO Vit C is the front runner for this car.
FYI - I painted a Dodge Ram sublime a few years ago and it turned out great! But I used a buff primer as it was recommended by a few people, maybe it made the difference but the color really popped.
FYI - I painted a Dodge Ram sublime a few years ago and it turned out great! But I used a buff primer as it was recommended by a few people, maybe it made the difference but the color really popped.
rklein71
Well-Known Member

@rklein71 I appreciate the photo. This is where I'm at - the outer wheelhouse is removed, EXCEPT for the top lip. I've read two way of doing this - let me know your thoughts:
1. Remove the welds from the top overlapping piece an the welds behind the wheelhouse-side of the window subframe.
2. Remove the lip from old outer wheelhouse up to the top mount and put the new outer wheelhouse over the outer existing upper lip.
Also - I don't have the trunk lid mounts in the inner wheelhouse (removed but will add them back later). Do you think I need to brace up anything if I remove the top welds?
rklein71
Well-Known Member
A few more pics of what I did. I don't know about extra bracing as I didn't have as much cut away as you do. I hope these help some.
Attachments
@rklein71 thanks that really helpful. I've got some sheet metal on the way to fabricate the bottom frame the rear window assembly mounts to. Unfortunately it looks like I might be a bit stuck on putting the new outer wheelhouse in until I get the outer rocker replaced and AMD is out of stock until October.
70chall440
Well-Known Member
looks good
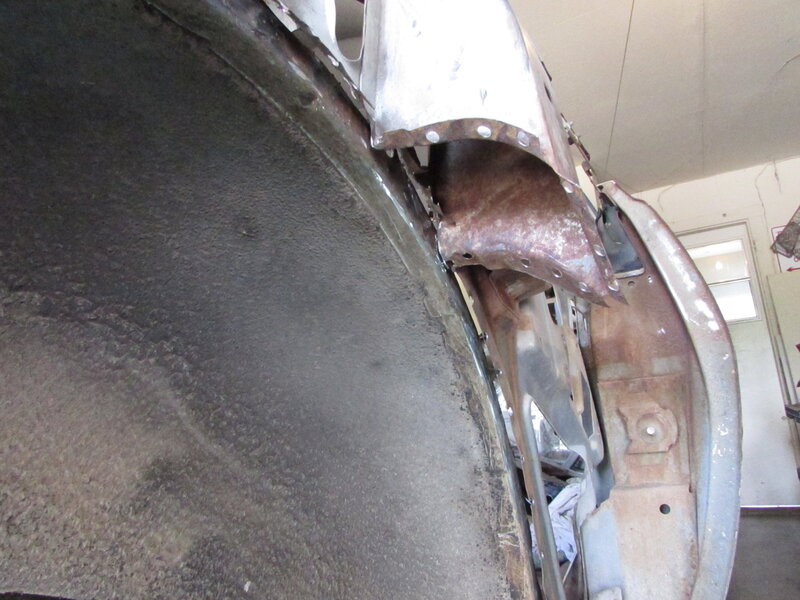
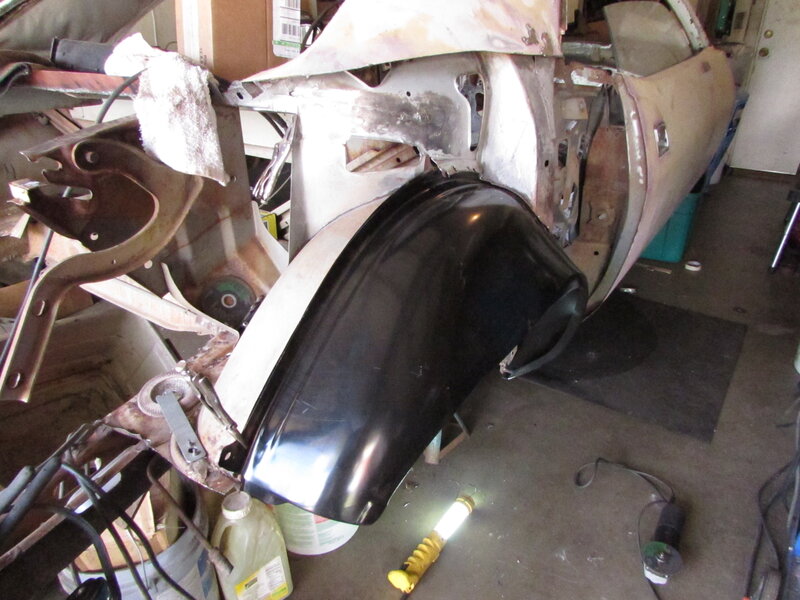
Hi all - back with an update. Since the outer rocker for the driver's side is on backorder, I started removing the passenger side quarters, etc. I've mocked up the outer wheelhouse and the floor extension. When I line up the edge of the trunk extension with the edge of the outer wheelhouse, the floor extension sticks out 1/4" past the rear tail panel. I'll need more trimming and fitting. Has anyone else had this issue with aftermarket extensions?
Passenger quarter panel removed.

Wheelhouse and floor extension removed. The tail light panel reinforcement and edge of the extension that were removed.

New outer wheelhouse and floor extension mocked in place.

Good alignment between floor extension and the wheelhouse. The alignment looks good and the inner grooves between the panels can be pulled together with clamps.

The back of the floor extension. There's currently a 1/4" gap. This will have to be trimmed and aligned for a gapless fit.

Passenger quarter panel removed.
Wheelhouse and floor extension removed. The tail light panel reinforcement and edge of the extension that were removed.
New outer wheelhouse and floor extension mocked in place.
Good alignment between floor extension and the wheelhouse. The alignment looks good and the inner grooves between the panels can be pulled together with clamps.
The back of the floor extension. There's currently a 1/4" gap. This will have to be trimmed and aligned for a gapless fit.
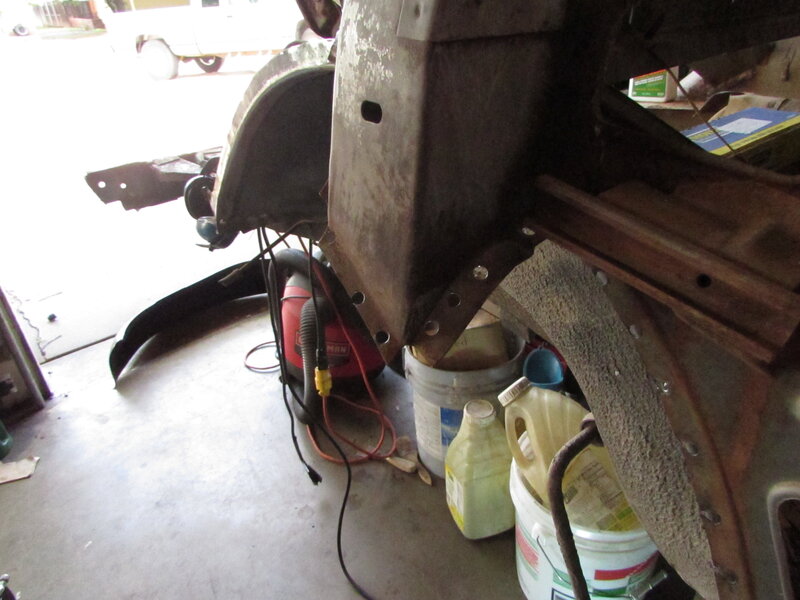
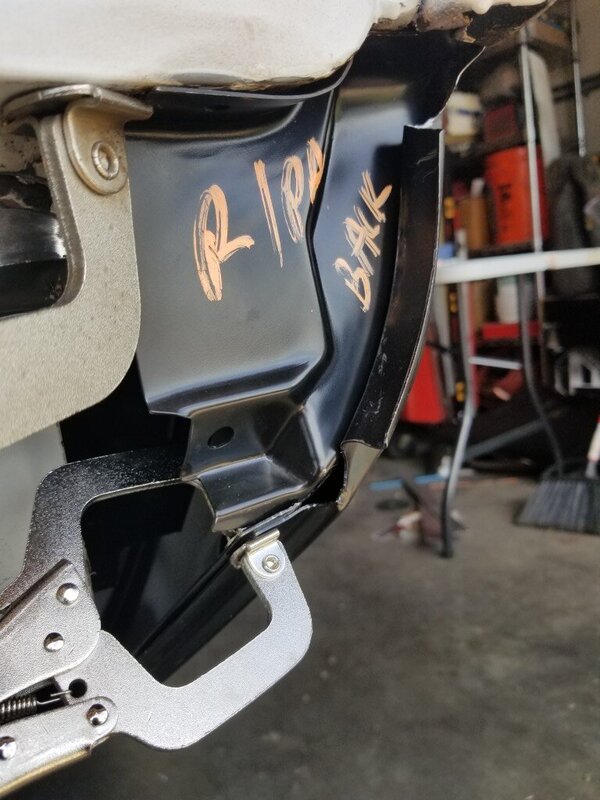
Hi all - got a bit sidetracked but back at it with the Cuda. The wheel well and trunk extension were welded in, followed by the quarter panel and tail light panel extension. It's starting to look like a car again.
Final test fit before welding the quarter panel and trial light panel extension.

Body lines while welding the quarter panel in. The arc of the panel was very close about 90% of the way but was a little off at the bottom.


New quarter panel along with new wheel well, trunk extension, tail light panel extension. It's coming together.

One of these days I'll have grind down all the seem welds and level with some filler.
Final test fit before welding the quarter panel and trial light panel extension.
Body lines while welding the quarter panel in. The arc of the panel was very close about 90% of the way but was a little off at the bottom.
New quarter panel along with new wheel well, trunk extension, tail light panel extension. It's coming together.
One of these days I'll have grind down all the seem welds and level with some filler.
Attachments
Similar threads
- Replies
- 5
- Views
- 529


