Scott19_72
Active Member
The Mission: Complete a disc brake swap from manual four wheel drums to manual front disc/rear drum with a combination of junkyard parts and parts store grade aftermarket parts.
The Specs: 1972 Dodge Challenger. Original Four Wheel Drum Car, Manual Brakes.
The Donor car: 1973 Plymouth Satellite.
Total cost: Approximetely $800 and most of my patience
So here we are, a full year later... While I'm stoked with the results the process was a huge PITA. Now I know why I waited 14 years to do my disc brake swap. The good news is everything works. The bad news is it took a year. To be fair, it was a year that saw a debilitating freak wrist injury (something called De Quervain's Tendinisis from a lifetime of wrenching, motorcycle riding and weight lifting), the birth of my second son and working a very demanding job. To be fair-er(?) I can lock the front brakes of my Challenger now!
I took a lot of pictures throughout the process and I want to post them walk-through style so if anyone else is going to take this on it will be that much easier. I had quite a few lessons in what not to do and if it wasn't for the excellent members of this forum I'm sure she'd still be up on stands in the garage tonight. I owe you guys and the least I can do is save you having to re-answer some of the same questions over and over again!
Note: It will take me some time to type this all up so consider it a work in progress.
Now let's start with the short list of things you'll need:
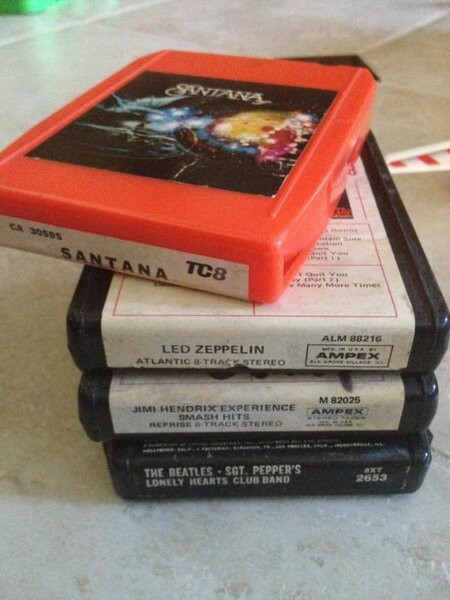
All the tools you think it will take and around 20 more you'll have to pick up, naturally on 20 separate runs to different parts/hardware stores. And tunes. You'll need tunes. Oh, and the spindles, caliper brackets and dust shields off of a junkyard 73 Satellite will be mighty handy too. I'd also recommend you score the calipers for cores when you buy rebuilds at your local parts store. I also got the Satellite emblems for my toolbox, just because they were cool. I've hauled these parts around in this box since '99, better late than never?
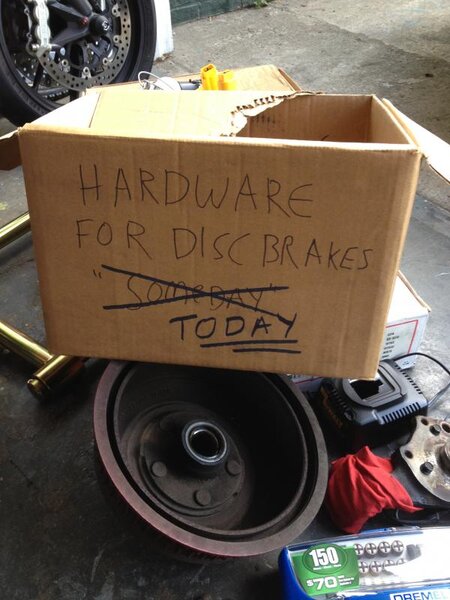
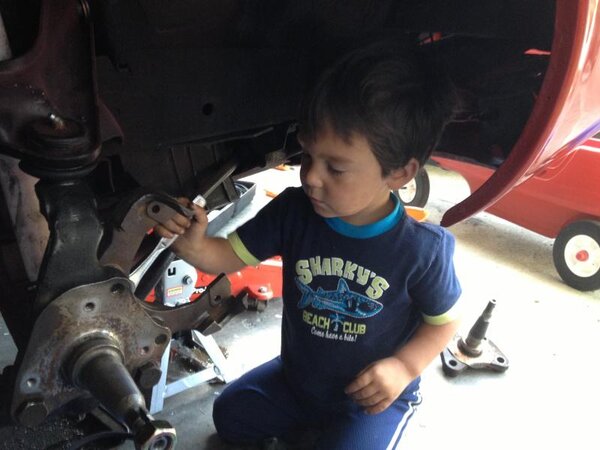
Some competent help never hurts either?
On the spindles: There's some debate out there online and in magazines as to whether or not B-body spindles and control arms bolt right onto our cars. They do. Gloriously.
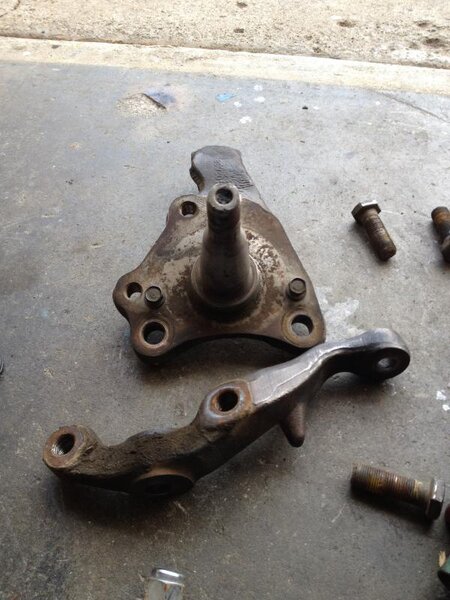
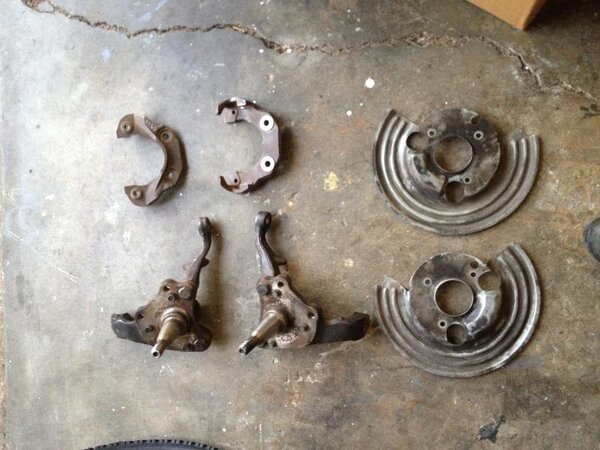
The Before:
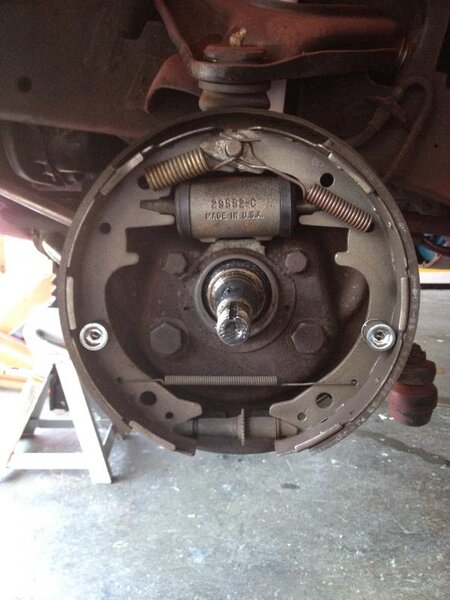
Step 1: Remove brakes? :icon_scratch:
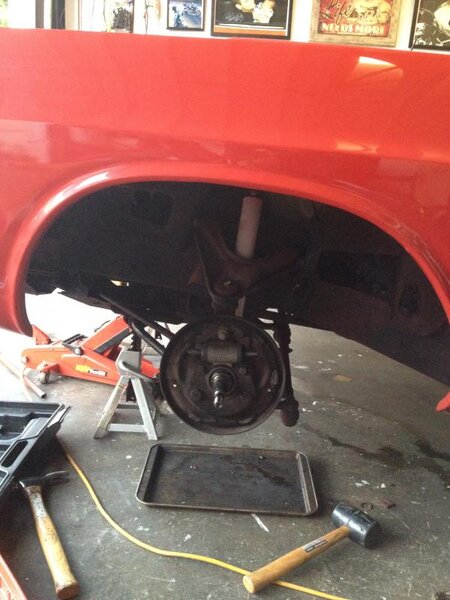
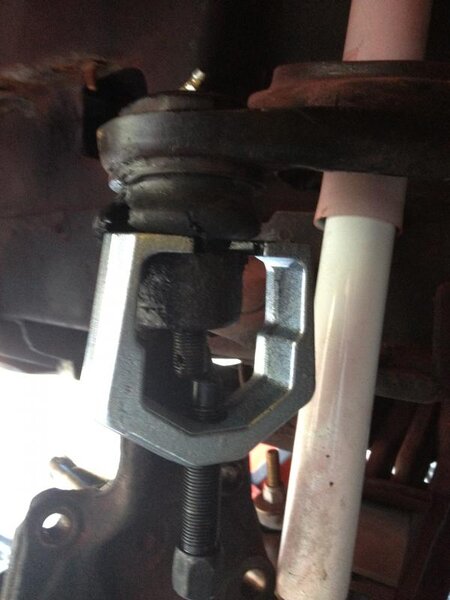
Step 2: Remove spindles. This was actually quite hard. It turns out a 21 ounce California framing hammer is a poor choice to hammer on spindles with. I tried this ball-joint separator tool and really gnarled the threaded end of the upper ball joint. I shredded the boot too. This is bad. Its bad because this boot and the ball joint must be pressed in as one piece, meaning technically I should have then pulled the upper arm and had a new boot and ball joint pressed in, adding a few more days (and bucks) to my project. I RTV'd the boot shut and hoped for the best instead. It's on my follow-up inspection list to see if it holds.
I was later informed by the excellent members of this forum that this part of the job is easily handled with smacking the same place on the spindle (pictured) with a much larger hammer. I picked up a 5 pounder and it did the job (without any more ball joint destruction) on the other side in a matter of minutes. These pictures represent about ten hours of idiocy on my part. Use the sledge, trust me on this.
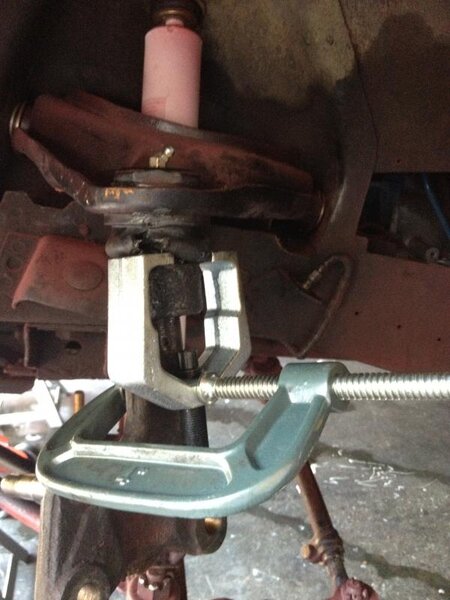
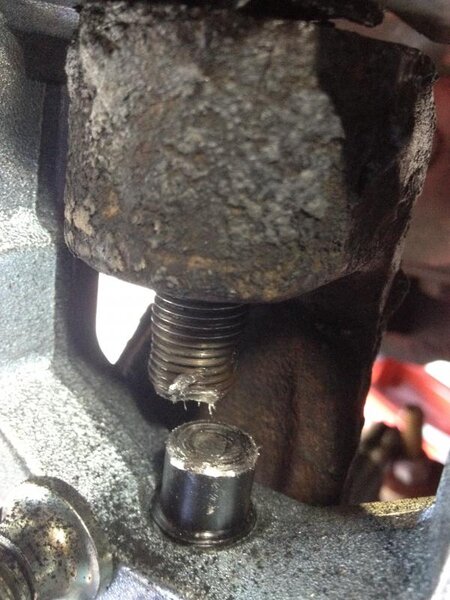
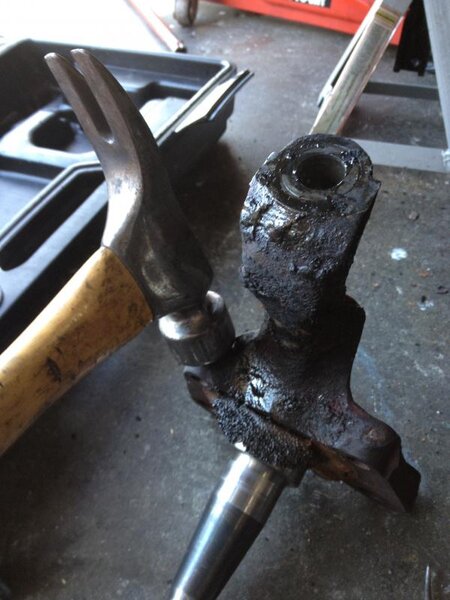
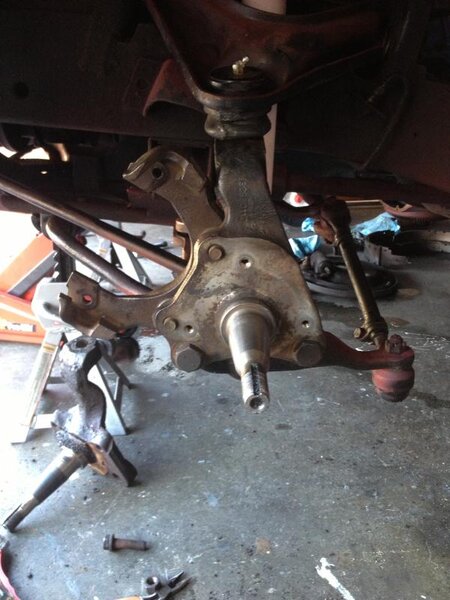
Step 3: Bolt up the new-to-your-E-body spindles. These B-body spindles bolted RIGHT in. I mean like PERFECTLY RIGHT IN. I didn't know this when I took the picture but they even preserved my alignment. I'm going to take it in and get her laser aligned to make sure nothing wears funny, but the steering wheel tracks perfectly centered, just like with the stock spindles.
It's worth pointing out I went with the calipers in front of the disc setup. I've read you can do it both ways and I'm not sure of the advantages of one or the other. I liked this setup after the first few of what would end up being around a hundred million test fittings.
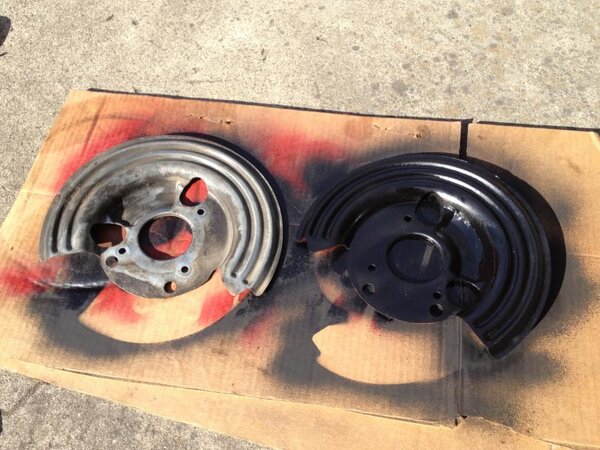
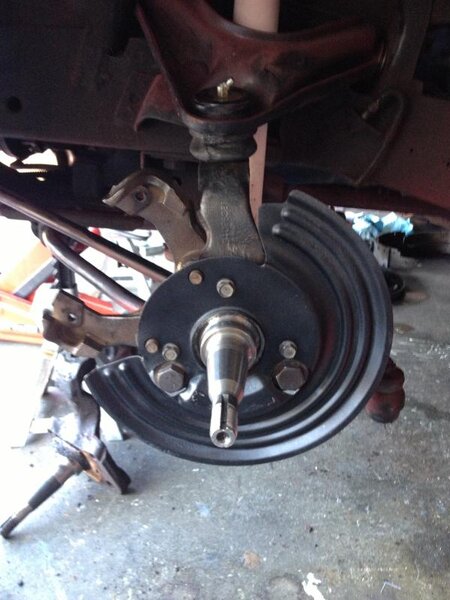
Cleaning up the old parts with a wire brush on a power drill is a good move. I used the axle nut to bolt a piece of PVC tube over the bearing surfaces to make sure I didn't scratch them up.
Step 4: Stand over this pile of inferiority, flex both arms and your chest and shout "I AM ALL THAT IS MAN!"
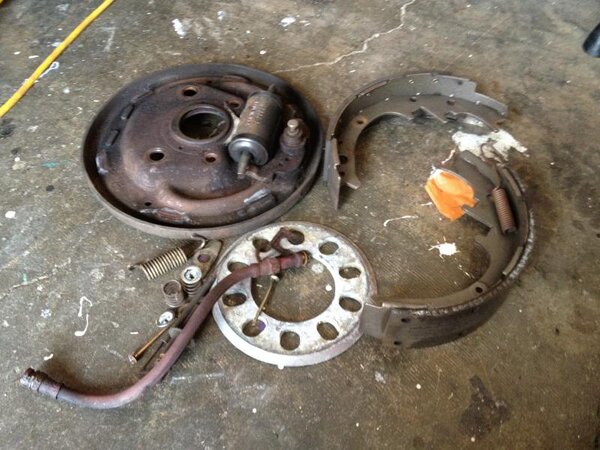
Step 5: Bearings, Seals, Hub/Rotor
I worked in auto parts 10 years ago and I bought most of the things I used back then based on the stock application for the 73 Satellite I looted for hard parts. It all fit together in the end. I wish I could go back in time and high five myself. GREAT SUCCESS!
This one was a head scratcher too and worth mentioning briefly. The lip on the 5121 seal goes DOWN, into the hub (as pictured). It makes sense if you think it through, the rubber lip would be destroyed against the spindle if mounted the other way. Oh and the National brand seals are FAR superior to other brands I checked out. Even if the parts shop has to order them, it's worth the wait. The 7032 rotor in the pic has a bunch of other good equivalent part numbers you might be able to use in a pinch. This is a cheap imported brand and the alignment wasn't perfect so I bought a much better quality American made set that I was much happier with.
View attachment 13080View attachment 13081View attachment 13082View attachment 13087
Test fit, test fit, repeat. Then repeat again. Then again.
View attachment 13083
One of the cheap imported hub/rotor assemblies wouldn't snug up no matter how tight I made the axle nut. It had a quarter of an inch of play in it with the nut bottomed out. I picked up some American made units for about $50 each and they were much better machined and fit nicely.
View attachment 13085
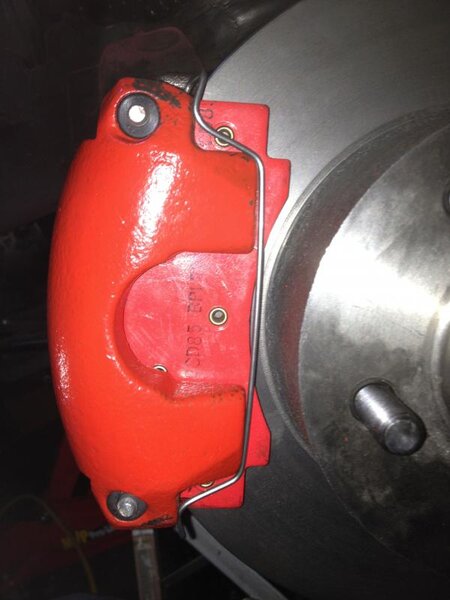
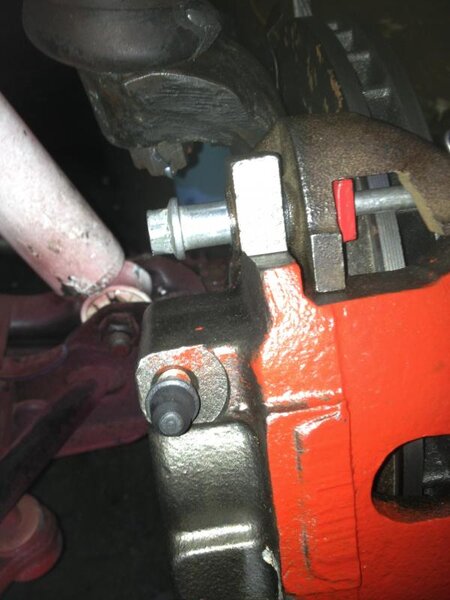
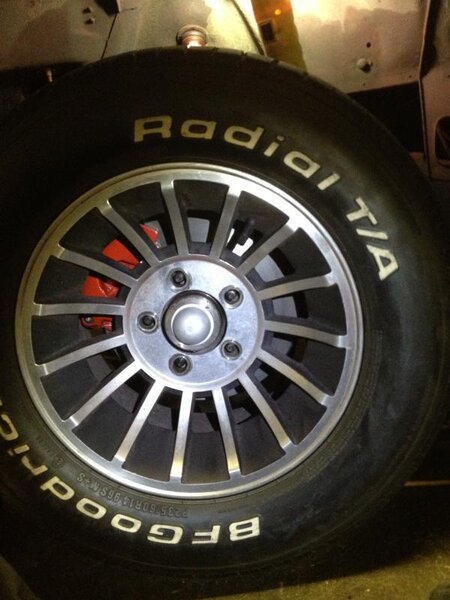
I painted the calipers to help me tell if the wheels were rubbing, NOT as a fashion statement.
View attachment 13086
It's important to keep a clean work area...
View attachment 13084
I didn't use these caliper pin clips. I think you need four of them for a proper install and I only had the two. Plus the common consensus on forebodiesonly was you can trash them. They just kind of bent when I mocked them up anyway so I'm not sure if they buy you too much. If anyone wants to weigh in I'd be interested if you use them. And if you bought them recently, where the hell did you find them?
Step 6: Calipers
--------------------------------------
...Stay tuned, more to come!!!!


The Specs: 1972 Dodge Challenger. Original Four Wheel Drum Car, Manual Brakes.
The Donor car: 1973 Plymouth Satellite.
Total cost: Approximetely $800 and most of my patience
So here we are, a full year later... While I'm stoked with the results the process was a huge PITA. Now I know why I waited 14 years to do my disc brake swap. The good news is everything works. The bad news is it took a year. To be fair, it was a year that saw a debilitating freak wrist injury (something called De Quervain's Tendinisis from a lifetime of wrenching, motorcycle riding and weight lifting), the birth of my second son and working a very demanding job. To be fair-er(?) I can lock the front brakes of my Challenger now!

I took a lot of pictures throughout the process and I want to post them walk-through style so if anyone else is going to take this on it will be that much easier. I had quite a few lessons in what not to do and if it wasn't for the excellent members of this forum I'm sure she'd still be up on stands in the garage tonight. I owe you guys and the least I can do is save you having to re-answer some of the same questions over and over again!
Note: It will take me some time to type this all up so consider it a work in progress.
Now let's start with the short list of things you'll need:
All the tools you think it will take and around 20 more you'll have to pick up, naturally on 20 separate runs to different parts/hardware stores. And tunes. You'll need tunes. Oh, and the spindles, caliper brackets and dust shields off of a junkyard 73 Satellite will be mighty handy too. I'd also recommend you score the calipers for cores when you buy rebuilds at your local parts store. I also got the Satellite emblems for my toolbox, just because they were cool. I've hauled these parts around in this box since '99, better late than never?


Some competent help never hurts either?

On the spindles: There's some debate out there online and in magazines as to whether or not B-body spindles and control arms bolt right onto our cars. They do. Gloriously.


The Before:

Step 1: Remove brakes? :icon_scratch:

Step 2: Remove spindles. This was actually quite hard. It turns out a 21 ounce California framing hammer is a poor choice to hammer on spindles with. I tried this ball-joint separator tool and really gnarled the threaded end of the upper ball joint. I shredded the boot too. This is bad. Its bad because this boot and the ball joint must be pressed in as one piece, meaning technically I should have then pulled the upper arm and had a new boot and ball joint pressed in, adding a few more days (and bucks) to my project. I RTV'd the boot shut and hoped for the best instead. It's on my follow-up inspection list to see if it holds.
I was later informed by the excellent members of this forum that this part of the job is easily handled with smacking the same place on the spindle (pictured) with a much larger hammer. I picked up a 5 pounder and it did the job (without any more ball joint destruction) on the other side in a matter of minutes. These pictures represent about ten hours of idiocy on my part. Use the sledge, trust me on this.


Step 3: Bolt up the new-to-your-E-body spindles. These B-body spindles bolted RIGHT in. I mean like PERFECTLY RIGHT IN. I didn't know this when I took the picture but they even preserved my alignment. I'm going to take it in and get her laser aligned to make sure nothing wears funny, but the steering wheel tracks perfectly centered, just like with the stock spindles.
It's worth pointing out I went with the calipers in front of the disc setup. I've read you can do it both ways and I'm not sure of the advantages of one or the other. I liked this setup after the first few of what would end up being around a hundred million test fittings.


Cleaning up the old parts with a wire brush on a power drill is a good move. I used the axle nut to bolt a piece of PVC tube over the bearing surfaces to make sure I didn't scratch them up.
Step 4: Stand over this pile of inferiority, flex both arms and your chest and shout "I AM ALL THAT IS MAN!"

Step 5: Bearings, Seals, Hub/Rotor
I worked in auto parts 10 years ago and I bought most of the things I used back then based on the stock application for the 73 Satellite I looted for hard parts. It all fit together in the end. I wish I could go back in time and high five myself. GREAT SUCCESS!
This one was a head scratcher too and worth mentioning briefly. The lip on the 5121 seal goes DOWN, into the hub (as pictured). It makes sense if you think it through, the rubber lip would be destroyed against the spindle if mounted the other way. Oh and the National brand seals are FAR superior to other brands I checked out. Even if the parts shop has to order them, it's worth the wait. The 7032 rotor in the pic has a bunch of other good equivalent part numbers you might be able to use in a pinch. This is a cheap imported brand and the alignment wasn't perfect so I bought a much better quality American made set that I was much happier with.
View attachment 13080View attachment 13081View attachment 13082View attachment 13087
Test fit, test fit, repeat. Then repeat again. Then again.
View attachment 13083
One of the cheap imported hub/rotor assemblies wouldn't snug up no matter how tight I made the axle nut. It had a quarter of an inch of play in it with the nut bottomed out. I picked up some American made units for about $50 each and they were much better machined and fit nicely.
View attachment 13085
I painted the calipers to help me tell if the wheels were rubbing, NOT as a fashion statement.
View attachment 13086
It's important to keep a clean work area...
View attachment 13084
I didn't use these caliper pin clips. I think you need four of them for a proper install and I only had the two. Plus the common consensus on forebodiesonly was you can trash them. They just kind of bent when I mocked them up anyway so I'm not sure if they buy you too much. If anyone wants to weigh in I'd be interested if you use them. And if you bought them recently, where the hell did you find them?
Step 6: Calipers


--------------------------------------
...Stay tuned, more to come!!!!
Last edited:


