
You are using an out of date browser. It may not display this or other websites correctly.
You should upgrade or use an alternative browser.
You should upgrade or use an alternative browser.
1970 A-66 Challenger Convertible
- Thread starter 340challconvert
- Start date
340challconvert
Well-Known Member
I concur with you
Every task always takes more time then anticipated.
I started my work on my A66 vert 5 years ago after pulling it out of storage since 1984.
I have no idea how to work with glass installs. That is a job I have never done and will have to tackle when I change out my driver's side door window regulator!
it takes forever let me tell ya.. 35 yrs so far and mine finally ran just last week... putting sideglass in now..PAIN IN THE A##..but it will be done this summer finally
put my side glass in today..its not too bad just make sure you put duct tape around those sharp openings..i did and it saved me some scrapes i,m sure.. here' s a quick run down..
[1] regulator in first
[2] front track lower bracket only in..remove guide rail from it [allen bolt]..bolt lower bracket in and snug it..
[3] slide front track onto glass
[4] slide glass into door [see gap in upper metal door frame for track to go into] and tilt it forward as it goes in..hold the front guide track so it does not slide off bottom nylon holder
[5] get front track bolted to lower front bracket [i used an old tape roll to support glass in bottom of door to line up hole]
[6] if you took off any guides on outer door frame put them on now... also put on outer cat whisker now if you are replacing them..
[7] connect glass to regulator [phillips screw up front, ..bolt with washer outside regulator lower slide , washer and gasket under it ] regulator slot slides in on top of washer with gasket
but below washer on the mounting bolt [pinches regulator between them]
[8] slide rear track in thru large hole in door..its really easy and goes right together..kinda sucks getting the top allen bolt back in but not bad..
good luck
340challconvert
Well-Known Member
340challconvert
Well-Known Member
ph; Thank you for posting the window install guidelinesput my side glass in today..its not too bad just make sure you put duct tape around those sharp openings..i did and it saved me some scrapes i,m sure.. here' s a quick run down..
[1] regulator in first
[2] front track lower bracket only in..remove guide rail from it [allen bolt]..bolt lower bracket in and snug it..
[3] slide front track onto glass
[4] slide glass into door [see gap in upper metal door frame for track to go into] and tilt it forward as it goes in..hold the front guide track so it does not slide off bottom nylon holder
[5] get front track bolted to lower front bracket [i used an old tape roll to support glass in bottom of door to line up hole]
[6] if you took off any guides on outer door frame put them on now... also put on outer cat whisker now if you are replacing them..
[7] connect glass to regulator [phillips screw up front, ..bolt with washer outside regulator lower slide , washer and gasket under it ] regulator slot slides in on top of washer with gasket
but below washer on the mounting bolt [pinches regulator between them]
[8] slide rear track in thru large hole in door..its really easy and goes right together..kinda sucks getting the top allen bolt back in but not bad..
good luck
340challconvert
Well-Known Member
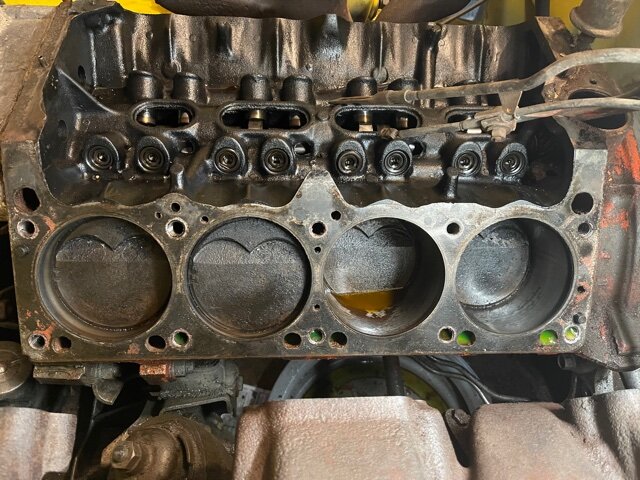
Started to turn attention to the 340 engine. It was last started 20 years ago, but the engine would not turn over by hand. Car has been garaged stored the whole time and I did not think it would be difficult to kick start the engine.
Filled the cylinders with Marvel Mystery oil, Krol, Blaster and other various chemicals designed to free up the pistons. No go.
Finally tore down the top end for an inspection
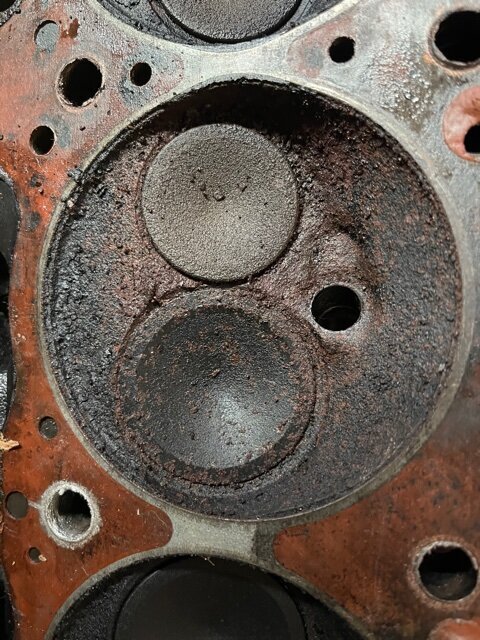
Very very minimal ridge at the top of the cylinders. No visible wear on drivetrain (lifters moved freely and were tight, no sludge)
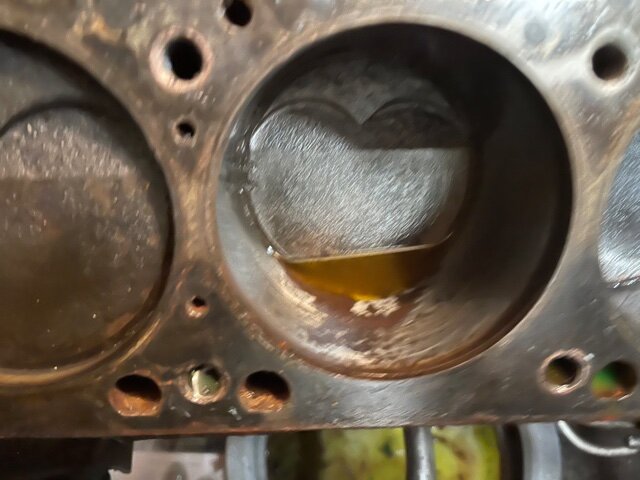
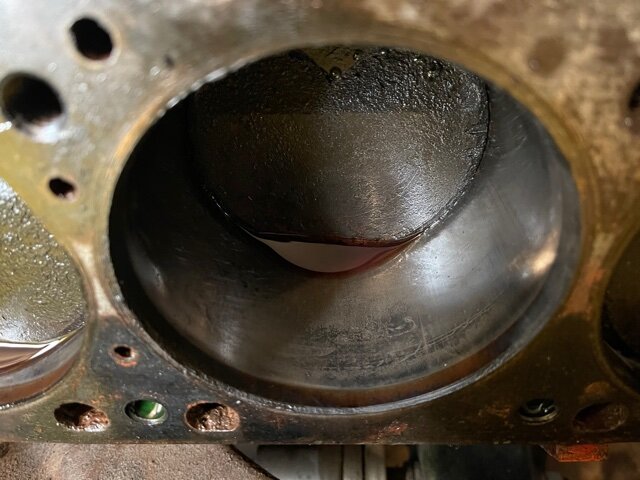
But; after removing the heads, cylinders appeared to be in good condition except for #5; small rust patch at mid point of cylinder. Actually found seeds (rodents) in the cylinder.
At this point, engine removal and a tear down will take place. I am hoping that the cylinders will clean up with a hone; forward progress will determine my direction.
Good time to just move forward and rebuild the engine.
Pic; left side cylinders (rust buster in #5 not water)
Filled the cylinders with Marvel Mystery oil, Krol, Blaster and other various chemicals designed to free up the pistons. No go.
Finally tore down the top end for an inspection
Very very minimal ridge at the top of the cylinders. No visible wear on drivetrain (lifters moved freely and were tight, no sludge)
But; after removing the heads, cylinders appeared to be in good condition except for #5; small rust patch at mid point of cylinder. Actually found seeds (rodents) in the cylinder.
At this point, engine removal and a tear down will take place. I am hoping that the cylinders will clean up with a hone; forward progress will determine my direction.
Good time to just move forward and rebuild the engine.
Pic; left side cylinders (rust buster in #5 not water)
Attachments
340challconvert
Well-Known Member
340challconvert
Well-Known Member
340challconvert
Well-Known Member
First time checking the actual engine numbers. It is a correct 1970 340 engine but is not original. DAM.
The engine was not in the car when I bought her in 1979, I did some valve/head work, put it together and drove the car back then.
I still prefer to have a "correct" engine rather then going to a stroker or other small block options.
Interesting notes on my engine:
- Both heads are number 3418915
- Left is dated 12/03/69 and is an O head 915 E?
- Right is dated 2/11/70 and is a U head
- Serial number on engine: FW340P 31350398
- Windsor engine w a Build date February 26, 1970
Last edited:
340challconvert
Well-Known Member
340challconvert
Well-Known Member
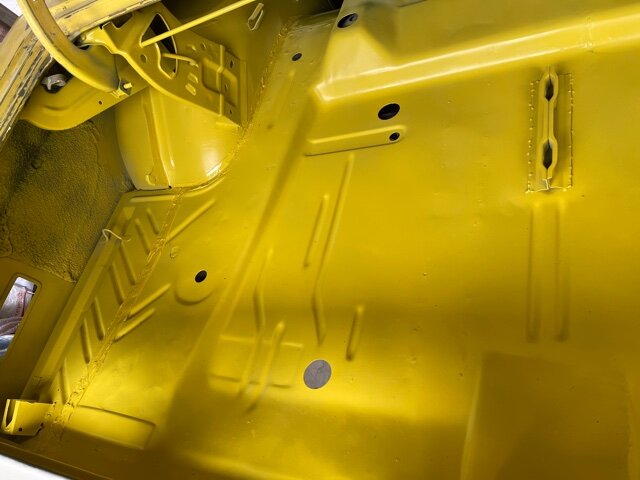
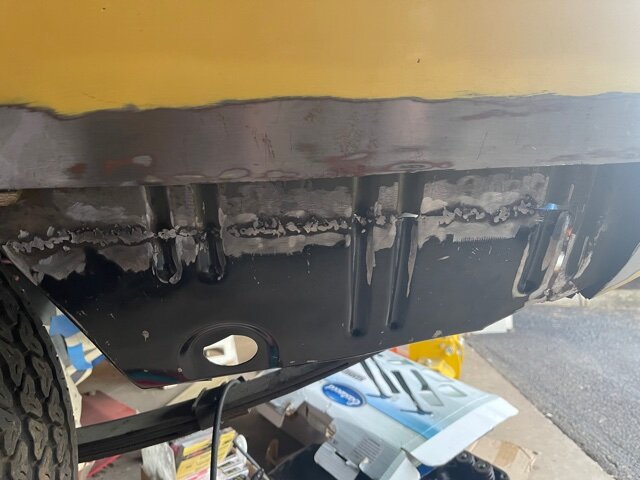
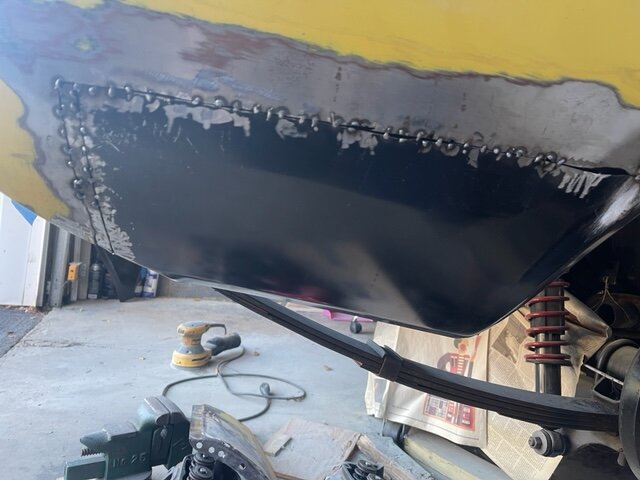
Rt side bottom qtr. panel patch; test fit and spot welds

Last edited:
340challconvert
Well-Known Member
Taking time with the quarter panel patches; slow spot welds and a damp rag seems to keep warping at a minimum.


Last edited:
340challconvert
Well-Known Member
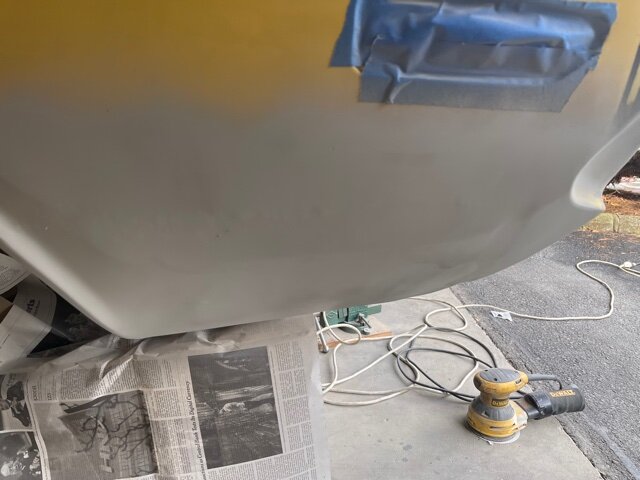
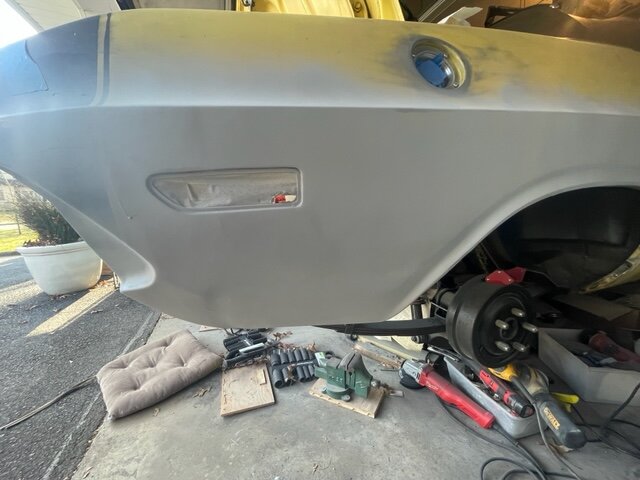
That’s looking good! Ready to see her paintedFinally epoxied the new left quarter patch and it is ready for some minimal body putty!
 . Good work
340challconvert
Well-Known Member
Thank you much!
That’s looking good! Ready to see her painted
340challconvert
Well-Known Member
340challconvert
Well-Known Member
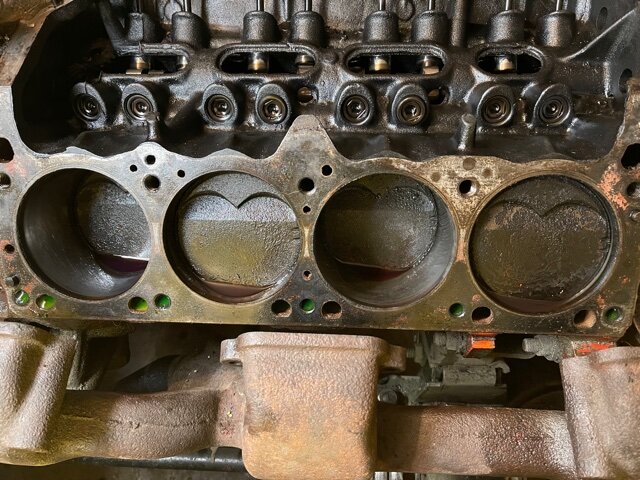
Working to getting the A66 340 engine running to make the car mobile again.
Cleaned up the cylinders in the 340
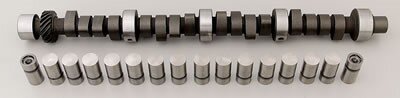
Decided to change the camshaft, sprockets, timing chain, push rods, and clean up the factory heads with new valve seals and valve springs.
Tough finding the parts you need when many are not available.
- Comp Cam CL20-223-3 with Xtreme Energy matching lifters
268/280 intake/exhaust duration w 110 degrees separation
Comp cam valve springs 901-16
- Howards Cam Double roller Billet Steel Timing Set HRS-94330
- FEL-260-1121ENGINE GASKET SET
Cleaned up the cylinders in the 340
Decided to change the camshaft, sprockets, timing chain, push rods, and clean up the factory heads with new valve seals and valve springs.
Tough finding the parts you need when many are not available.
- Comp Cam CL20-223-3 with Xtreme Energy matching lifters
268/280 intake/exhaust duration w 110 degrees separation
Comp cam valve springs 901-16
- Howards Cam Double roller Billet Steel Timing Set HRS-94330
- FEL-260-1121ENGINE GASKET SET
Attachments

340challconvert
Well-Known Member
In conjunction with getting the A66 running; the exhaust system needs some work;
The system on the car had a custom H pipe going into factory resonators, over axle pipe and mufflers,
H pipe is in good condition; the resonators and mufflers will be be replaced
Picked up accurate resonators; will get the rest as finances allow. Did not spring for the "date coded" muffler's high cost. Nice stuff.
340challconvert
Well-Known Member
Similar threads
- Replies
- 0
- Views
- 769
- Replies
- 20
- Views
- 1K


