• Welcome to For E Bodies Only !

    We are a community of Plymouth Cuda and Dodge Challenger owners. Join now! Its Free!

1970 A-66 Challenger Convertible

340challconvert

Well-Known Member
Joined
Feb 13, 2011
Messages
5,190
Reaction score
2,731
Location
Parsippany, NJ
Thanks for the support guys
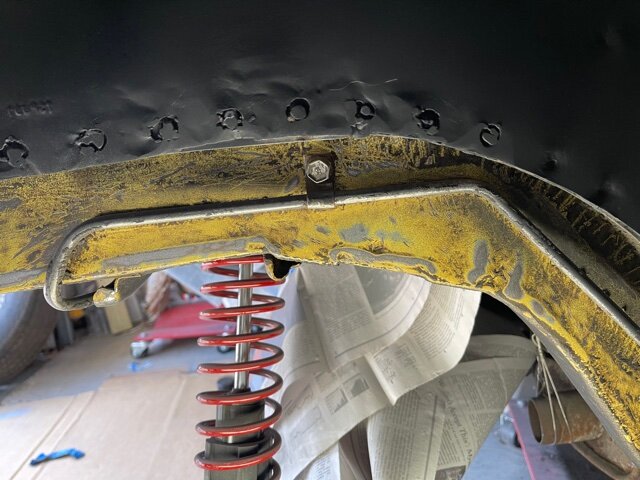
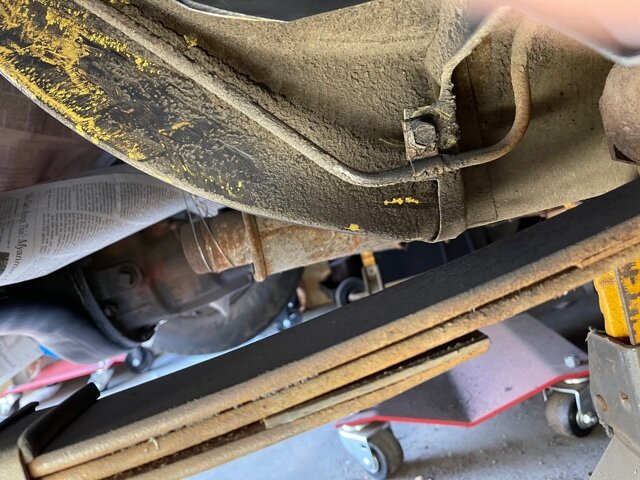
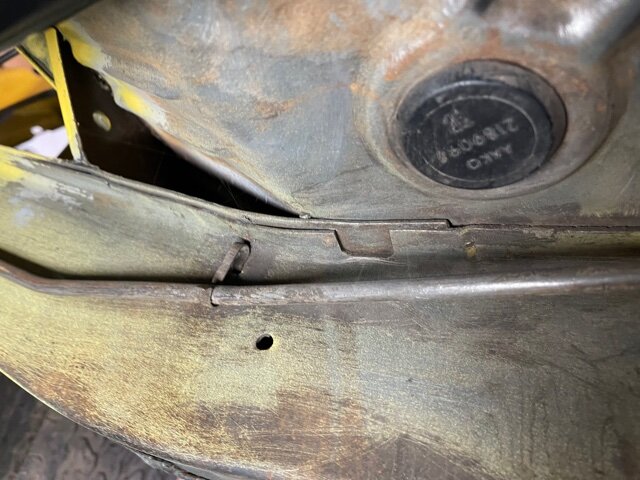
Driver's side is good.
Needs on small strip (1/2 x 2 in) up by the wheel well/ trunk floor connection. Rest is very good.
Good thing that I removed all the factory undercoating; finding these small defects underneath!

1611056955995.png


IMG_1878.JPG
 
Last edited:

340challconvert

Well-Known Member
Joined
Feb 13, 2011
Messages
5,190
Reaction score
2,731
Location
Parsippany, NJ
Working on the front end metal; found stress cracks on the inner fender to firewall braces. Welded up the stress areas for extra support.

Left brace.JPG


IMG_5684.JPG


IMG_5682.JPG


IMG_5685.JPG
 
Last edited:

340challconvert

Well-Known Member
Joined
Feb 13, 2011
Messages
5,190
Reaction score
2,731
Location
Parsippany, NJ
Finally installed the rest of the new brake lines, valves, and test fit a master cylinder.


Attachments

  • IMG_5448.jpg
    IMG_5448.jpg
    41.1 KB · Views: 226
  • IMG_5451.jpg
    IMG_5451.jpg
    39.7 KB · Views: 218
  • IMG_5457 (1).jpg
    IMG_5457 (1).jpg
    36 KB · Views: 225
  • IMG_5458 (2).jpg
    IMG_5458 (2).jpg
    37.1 KB · Views: 217

340challconvert

Well-Known Member
Joined
Feb 13, 2011
Messages
5,190
Reaction score
2,731
Location
Parsippany, NJ
Thanks for the compliments
Still plenty to do. I want to get the engine running; a lot to do up front first though.
Seals are most likely dried out; will eventually have to pull it to reseal.
The fluid also came out of he trans pan seal a few years back.
Next steps; clean up the engine, prime and prep for a start.
Have to install the new gas tank and new fuel lines first.
Trans gasket, new filter and fluid.
Looking to get the car movable.
Can't wait for a weather warm up :steering:
 

340challconvert

Well-Known Member
Joined
Feb 13, 2011
Messages
5,190
Reaction score
2,731
Location
Parsippany, NJ
Installed a new stainless 5/16 fuel line prior to a new fuel tank install. . Original still had the crimp clips on each end. Used the original fuel line to bend the replacement correctly.
 

Attachments

  • IMG_5541 (2).jpg
    IMG_5541 (2).jpg
    83.2 KB · Views: 169
  • IMG_5540 (2).jpg
    IMG_5540 (2).jpg
    93.5 KB · Views: 182
  • s-l1600.jpg
    s-l1600.jpg
    22.3 KB · Views: 164

340challconvert

Well-Known Member
Joined
Feb 13, 2011
Messages
5,190
Reaction score
2,731
Location
Parsippany, NJ
Took pics of the original fuel line routing just to be safe in identifying placement of clips and proper bends.
 

Attachments

  • IMG_5530.jpg
    IMG_5530.jpg
    44.3 KB · Views: 194
  • IMG_5531.jpg
    IMG_5531.jpg
    58.1 KB · Views: 204
  • IMG_5535.jpg
    IMG_5535.jpg
    39 KB · Views: 193
  • IMG_5537.jpg
    IMG_5537.jpg
    46 KB · Views: 184

340challconvert

Well-Known Member
Joined
Feb 13, 2011
Messages
5,190
Reaction score
2,731
Location
Parsippany, NJ
This is what my tank/sending unit looked like when I started tearing the car down.
 

Attachments

  • IMG_2807.JPG
    IMG_2807.JPG
    789.6 KB · Views: 195

340challconvert

Well-Known Member
Joined
Feb 13, 2011
Messages
5,190
Reaction score
2,731
Location
Parsippany, NJ
Question about gas tank top pad
Original was made of an asbestos material; obviously no longer made
I bought a rubber version a few years back I was going to use.

detroitmuscletechnologies sells the rubber unit as well as a .070 thick felt paper unit similar to oem.
Concern; would the rubber mat hold water above the gas tank against the trunk floor? Better or worse then the HD rubber insulation unit that is now sold?
Anyone use either of these?
 

340challconvert

Well-Known Member
Joined
Feb 13, 2011
Messages
5,190
Reaction score
2,731
Location
Parsippany, NJ
Seam sealed the trunk (a little neater then original) after taping off the seams. Stuff is brutal to work with.
Painted the new trunk floor. Wanted to do this prior to fuel tank install to keep things clean!
 

Attachments

  • IMG_5617.jpg
    IMG_5617.jpg
    19.5 KB · Views: 186
  • IMG_5619 (1).jpg
    IMG_5619 (1).jpg
    30.5 KB · Views: 188

ph23vo

Well-Known Member
Joined
Apr 3, 2011
Messages
393
Reaction score
119
Location
seattle
it takes forever let me tell ya.. 35 yrs so far and mine finally ran just last week... putting sideglass in now..PAIN IN THE A##..but it will be done this summer finally
 
Back
Top