• Welcome to For E Bodies Only !

    We are a community of Plymouth Cuda and Dodge Challenger owners. Join now! Its Free!

73 Cuda Front End Surprises.

tpietzsch

Member
Joined
Jun 29, 2011
Messages
24
Reaction score
1
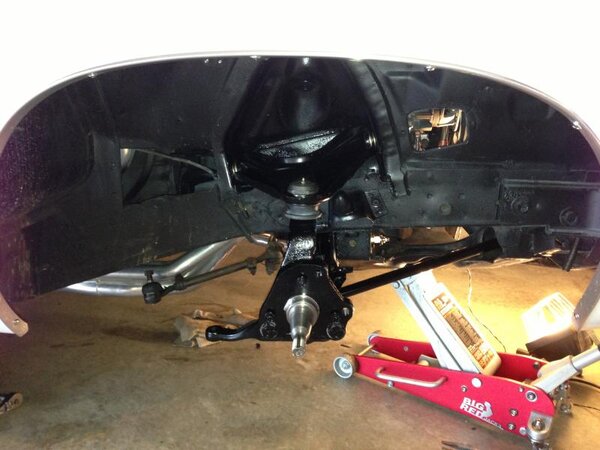
Well fellas, my Cuda’s handling just isn’t cutting it any more. She’s starting to get a tad squirrely. This car has been a part of my life since new and the front end has never been blown apart so I figure its time. Being a little intimidated by the job I’ve been reluctant to start but thanks to all of you who have posted various suspension related threads I’ve jumped in. 1[SUP]st[/SUP] move was purchasing a chassis manual which is fantastic by the way, I’m feeling invincible. Due to limited garage space I’ve torn down the passenger side. I opted for one of the complete frt suspension rebuild tool kits which has made the tear down easy breezy. Because the car hasn’t been in any accidents I was surprised to find a couple things. One, the upper ball joint was floating around in the A-arm. Closer inspection reveals some pretty worn out threads. Two, the strut arm has a bit of wiggle in it (pic below). Three, 40 year old grease and grime is stubborn as hell to get off. Next step is some sandblasting and paint. Anyway, thanks to many of you for getting me started.

The plan, as of this hour, is to go with poly bushing, replace the upper control arm along with the lower control arm strut rod. I’m thinking about replacing the pivot while I’m at it.

Thanks again for being a great reference. More to come.....

085.jpg


086.jpg


091.jpg


102.jpg


108.jpg
 
Last edited:

azmoparboy

Well-Known Member
Joined
Apr 13, 2012
Messages
102
Reaction score
22
Location
Chandler AZ
Hi, Glad to see that you are going to give it a try. I've rebuilt a 73 b-body front end and I'm starting to do my latest project, a 1971 Challenger. I think the hardest of the hole job is getting the lower control pivit bushing out. In the press, you can push out the large pivit pin, but the bushing sleeve is still in the arm. I don't buy a fancy tool to remove it, I took a roto file and carfully ground down the bushing so I could pry it out. After you get all of the bushings out of all the other part, clean, paint and get everything ready to reassemble, having a 20 ton press is needed. One other thing that I did was to rebuild my brake calipers. Super easy job, less than $5 for each side. I know you can do it all and when its all done and back together it will look so good and the car will handle so much better. Good Luck
 
Last edited:

PST

Well-Known Member
Joined
Jan 4, 2012
Messages
106
Reaction score
15
Great Job so far. Just my 2 cent, but with having everything apart you might as well start fresh with new pivot shaft. They are not overly expensive and you are already in there. I would also look into replacing the strut rods whether it is with new, adjustable, or used but those ones are a little to wiggly in my opinion. I also think its smart that you are doing one side at a time not because of space limitations LOL but it good to have a reference side. Keep the good work up.

James From
PST Marketing
1-800-247-2288
Ext 316
10% off orders over $200 for members of this forum
 
Last edited:

Adrian Worman

Well-Known Member
Joined
Jan 29, 2012
Messages
155
Reaction score
6
Location
England
You can get pivot pins with grease nipples in em now.
Could be a good idea if you're going the poly bushing route?
PST man is dead right, those adjustable strut rods help loads with setting up castor.
 

Moparparts

Well-Known Member
Joined
Nov 15, 2010
Messages
1,067
Reaction score
45
Don't forget, need to replace that lower control arm bumper also. Should handle better than a new one when done
 

tpietzsch

Member
Joined
Jun 29, 2011
Messages
24
Reaction score
1
cuda.jpg
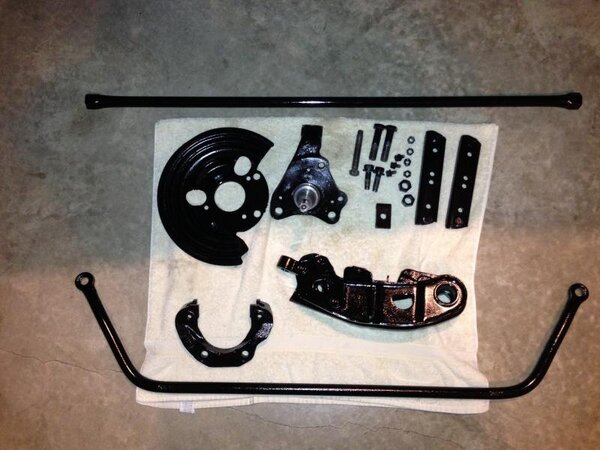
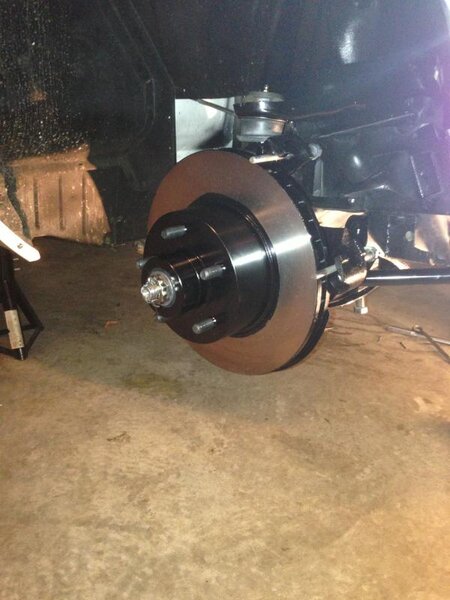
Blasted, cleaned and painted, these parts made the cut to be re-used. They actually turned out really good. I should have time to order up some parts this week or weekend. I'm tentatively leaning towards Energy Suspension Poly kit, Stock upper control arm for now (Hotchkis has a great piece but DAMN expensive), PST pivot shafts and adjustable control arm strut. This may change once I dive into pricing and availability but this is what I'm looking at anyway.

cuda.jpg
 

Chryco Psycho

Well-Known Member
Joined
Dec 28, 2008
Messages
4,460
Reaction score
2,110
Location
Panama
I have yet to be sold on replacement upper arms , the stock are one piece , no welds to break & with some offset bushings can get you a lot of caster adjustment . the second choice would be the Hotchkiss double adjustable arms to make the spindle move straight up & down , you lose the anti dive but gain on bump steer arc . but Ihave seen problems with the heim joints in street use .
 

challenger440

Active Member
Joined
Jun 5, 2011
Messages
42
Reaction score
0
Location
Santa Maria, CA
Fantastic! Just got done with all that and am sure you'll be fine. Seems like you've got it under control. Only thing I could suggest is plan your work, then work your plan. I had a "well, since I'm down here" project that took me over a year by adding and mulling different options. I wound up going with the Hotchkis control arms. Extremely nice but super expensive, for me. For all the bushings I bought Moog all around and was real happy. Poly can squeak & creek and with tubular arms deflection will be minimal anyways. I had all the "tough" bushings pressed in by a shop for $50. Saved me a lot of time & frustration.

Good luck & keep us posted. Looks great!
 

PST

Well-Known Member
Joined
Jan 4, 2012
Messages
106
Reaction score
15
I agree with Challenger440 come up with a plan and execute. If you are on a budget stick with the stock arms and the moog problem solver upper control arms. If you want down the road save up for the tubular uppers and install later as they are easy to swap out in the future. Just my .02 cents

Thanks
James
 

daroldmac

Member
Joined
Jul 5, 2011
Messages
13
Reaction score
0
check with PST or some of these guys here. when i did the front of my 74 'cuda, a lot of the old school guys were telling me to stay with rubber instead of poly. Various reasons from everyone, but ask around. After a quick vote count, it was rubber 3-1 over poly, so i went with the rubber. all was, and still is good.
 

tpietzsch

Member
Joined
Jun 29, 2011
Messages
24
Reaction score
1
Parts are ordered, I'll fill you in with the details of what I decided soon. With all the snow in KCMO I'm sure my deliveries will be a little delayed.
 

moparleo

Well-Known Member
Joined
Oct 17, 2011
Messages
6,944
Reaction score
1,736
Location
So. Cal. Riverside area Moreno Valley
Don't forget to get new shocks. KYB Gas-adjust are fantastic for this. KG4510 part number. They are white and you can just paint them black if you want a more stock look. I've have been using KYB's for almost 40 years. A tip to use with Mopar upper control arms is to tack weld the new ball joints to the arm witha mig welder. This will keep them tight. Loose balljoint on the uppers is a pretty common problem.so
 

ramenth

Well-Known Member
Joined
Oct 7, 2009
Messages
2,106
Reaction score
104
Location
Beaver Dams, NY
check with PST or some of these guys here. when i did the front of my 74 'cuda, a lot of the old school guys were telling me to stay with rubber instead of poly. Various reasons from everyone, but ask around. After a quick vote count, it was rubber 3-1 over poly, so i went with the rubber. all was, and still is good.


Really? That's interesting.

Granted, there's nothing wrong with rubber, but it deflects. Urethane doesn't. Also, if the car is sitting for months (like they do in upstate NY) I go urethane to ward off the issues associated with sitting on cold concrete floors.
 

ramenth

Well-Known Member
Joined
Oct 7, 2009
Messages
2,106
Reaction score
104
Location
Beaver Dams, NY
Don't forget to get new shocks. KYB Gas-adjust are fantastic for this. KG4510 part number. They are white and you can just paint them black if you want a more stock look. I've have been using KYB's for almost 40 years. A tip to use with Mopar upper control arms is to tack weld the new ball joints to the arm witha mig welder. This will keep them tight. Loose balljoint on the uppers is a pretty common problem.so


Leo, you and I oughtta get paid by KYB for being salesmen.


Everything I drive has KYB's, from Sarah's Hyundai, to my F150. They're all I sell to my customers.

One of the reasons I've called it quits at my shop. My (soon to be former) business partner thinks parts is parts and goes the cheap route on everything he owns. Then stands back and bitches that his Ram feels like **** in the ass end because he went with cheaper shocks instead of going with what I recommended: Monomax. It's not very good advertisement for the business when he runs cheap while I sell only KYB's to our customers.
 

tpietzsch

Member
Joined
Jun 29, 2011
Messages
24
Reaction score
1
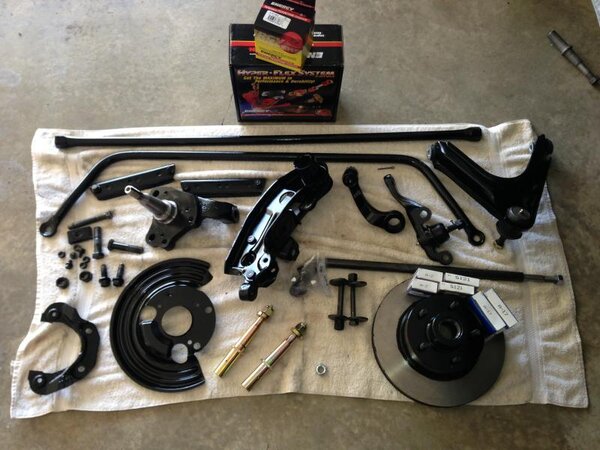
Well reality caught up with me as I was shopping for parts. I had to come back around to the original goal which was to freshen up the front end to improve handling. The cost exceeded my initial estimates due to replacing the upper control arm, strut rod, brake rotor, and bearings. Little stuff like paint, brake clean, chassis manual, and tools really added up fast too. Good, bad, or indifferent this is what I came up.

$119.95 Energy Suspension Hyperflex kit ENS-5-18105G
$10.69 Energy Suspension Stabilizer Bushing set ENS-5-5113G
$110.00 Firm Feel strut rods (originals were bent)
$100.00 Firm Feel greasable lower control arm pins (nice piece)
$129.99 Classic Industries upper control arm (ME1617)
$9.99 Poly upper control arm bump stop
$36.78 Car Quest Lower Ball Joint PCH 505-1003 (K781)
$14.38 Car Quest Qty 2 eccentric cam bolts
$26.78 Car Quest Brake rotor BDR
$6.92 Car Quest Bearing A17
$8.18 Car Quest Bearing A2
$2.32 Car Quest Oil Seal 5314

A few other items I need to pick up are:
Torsion bar dust boot
Wheel Bearing cap
Splash shield gasket
Prothane grease 19-1751
Shocks

I’m sure I’ll have more incidentals but this is where it’s at today. I’m hoping to start the assembly soon. Good news is once this side is done I get to do the other…..;-)
Cuda1.jpgCudaLower.jpg

Cuda1.jpg


CudaLower.jpg
 

tpietzsch

Member
Joined
Jun 29, 2011
Messages
24
Reaction score
1
cuda bud.jpgcuda2.jpg

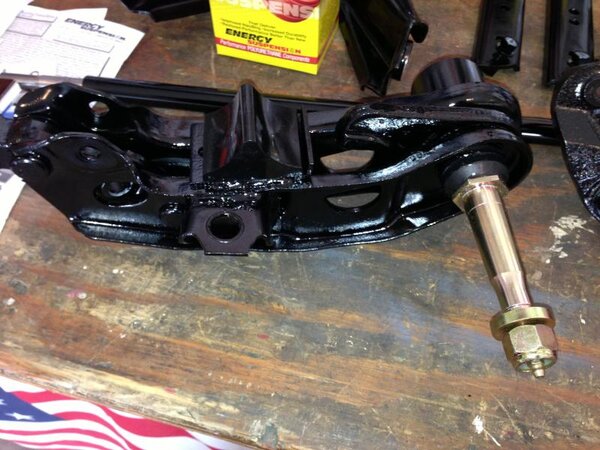
It's going back together lickity split. I just need to order those other parts and I can call it "done son"!

cuda bud.jpg


cuda2.jpg
 

tpietzsch

Member
Joined
Jun 29, 2011
Messages
24
Reaction score
1
006.jpg008.jpg

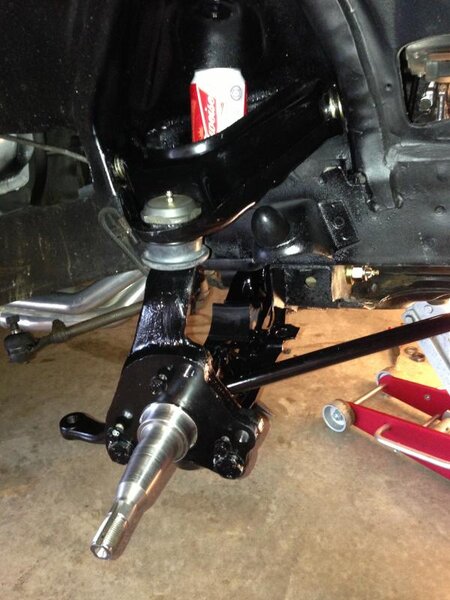
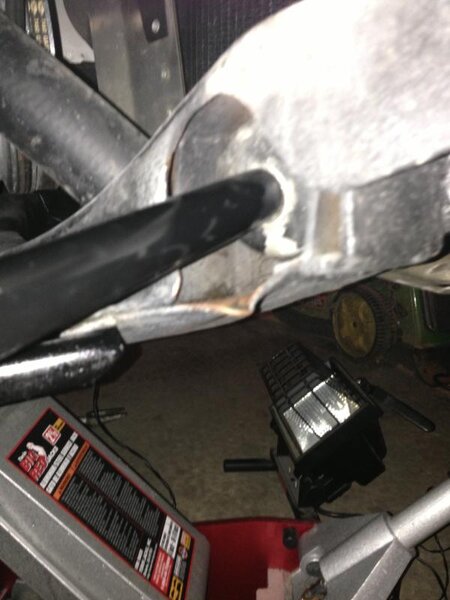
I didn't notice this nice divot in the K member on tear down below the strut rod but this explains why the rod was bent. Also hoping I didn't get into to much of a hurry with assembly as i still need to slide the torsion bar in. Wondering with the upper control attached if there will be enough droop to allow the bar to be inserted into the lower arm. Crossing my fingers. Awaiting the dust boots.

006.jpg


008.jpg
 

tpietzsch

Member
Joined
Jun 29, 2011
Messages
24
Reaction score
1
Don't forget to get new shocks. KYB Gas-adjust are fantastic for this. KG4510 part number. They are white and you can just paint them black if you want a more stock look. I've have been using KYB's for almost 40 years. A tip to use with Mopar upper control arms is to tack weld the new ball joints to the arm witha mig welder. This will keep them tight. Loose balljoint on the uppers is a pretty common problem.so[/QOTE]


Thanks for the tip. At quick glance it looks like Summit Racing has them for about $28.52 a piece. I'm ready to finish this front end and move onto new wheels and tires. My current set is the finest 1990 had to offer....;-)
 

tpietzsch

Member
Joined
Jun 29, 2011
Messages
24
Reaction score
1
Well, the passenger side is all buttoned up with the exception of the wheel bearing dust cap (Dorman part# 13996). I tore down the driver’s side relatively fast last night so it’s scrapping and sandblasting time. No visual damage like what I saw on the passenger side with the A-arm, Strut Rod, and dinged up K-member. Other than upper and lower ball joints and a fresh coat of paint I think I’m golden.
Question, I’m a little nervous to have it aligned due to incompetence of the various shops. Researching various forums these are the alignment specs I found. Keep in mind this car is the family and weekend cruiser so no track days in it’s near future (don’t get me wrong, I like to flog it as often as possible). Thoughts about these specs is appreciated.
Camber: Zero to -1 Degrees
Caster: 3 to 5 Range of Positive Caster
Toe: .0625 to .125 Total Toe In
 
Back
Top