• Welcome to For E Bodies Only !

    We are a community of Plymouth Cuda and Dodge Challenger owners. Join now! Its Free!

My 70/72 'Cuda (re) build.

clamcake

Well-Known Member
Joined
Jan 8, 2015
Messages
105
Reaction score
7
Location
Boston
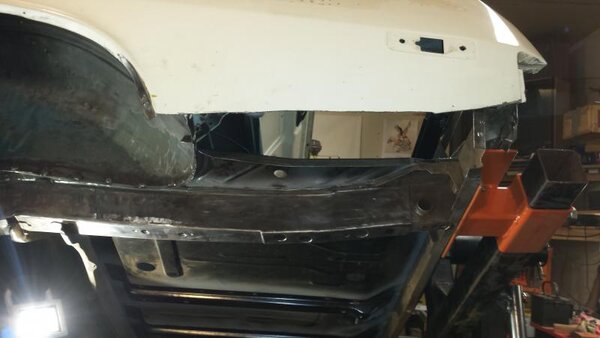
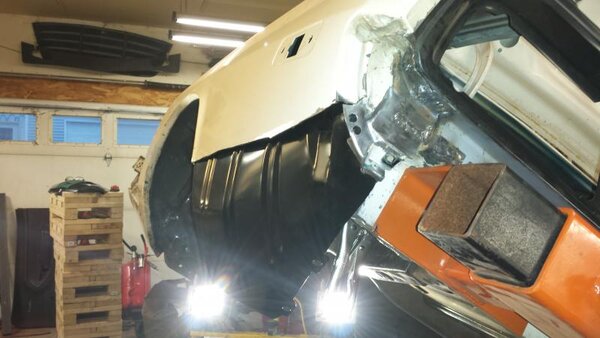
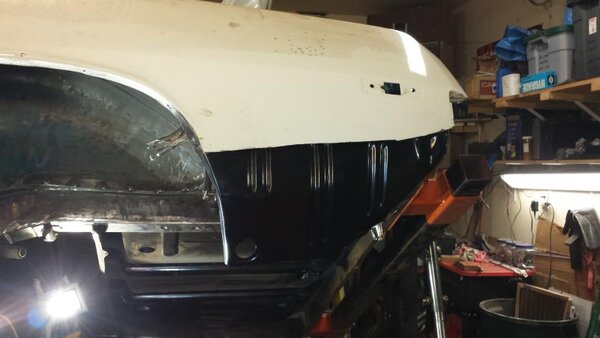
Here are the rotisserie brackets I made for the back of the car. They, of course, use the bumper bracket holes to attach. The rotisserie has a 3" square horizontal bar that will go through these brackets. Painted with orange engine paint I had laying around.

View attachment 18741View attachment 18740

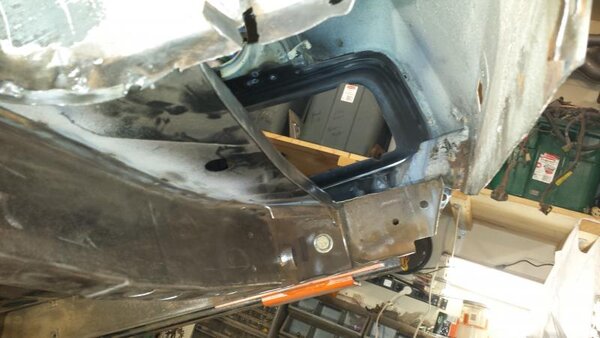
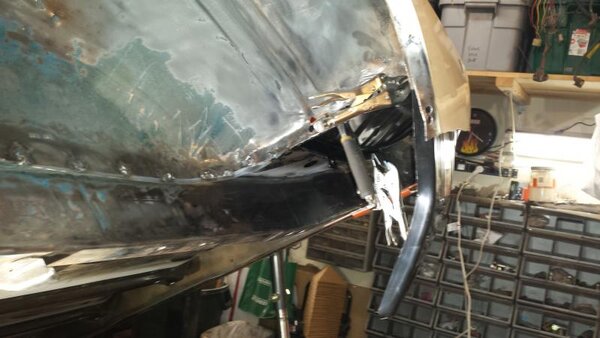
Not much left up front now. Here are the beginnings of the front rotisserie mount as well. I am starting from a very generic mount that came with the rotisserie. Had to cut and grind most of the car side of the bracket away to make it work. I am building it so it will be level and the same height as the rear mount so the car wont be stressed when it is turned.
View attachment 18738View attachment 18743

Unfortunately the positions of the front bumper bracket bolt holes are not ideal for this. This means I can't just weld the brackets to the top of my main angle iron brackets and need to create side plates to weld down to the angle iron and to the sides of the bracket itself. But it should be fine. I just want to make sure it is level front to back. I am expecting a friend over on Friday to help me get it on the rotisserie so I am trying to get it finished up.
View attachment 18737View attachment 18739

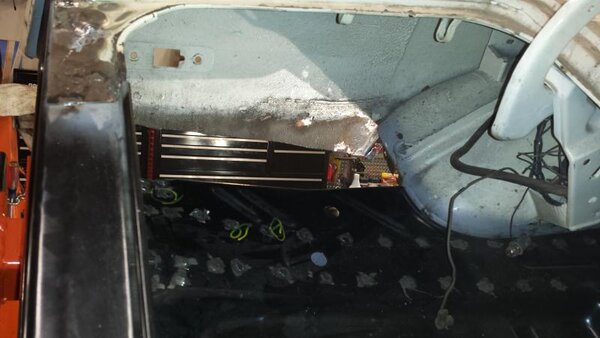
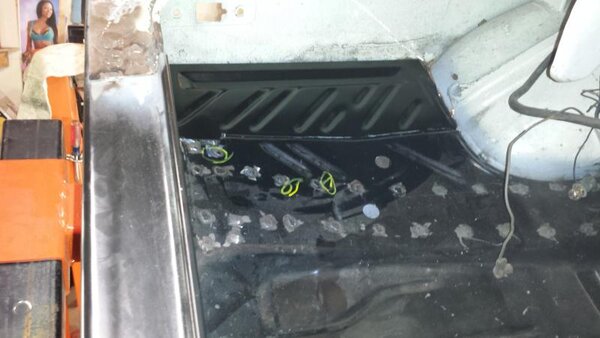
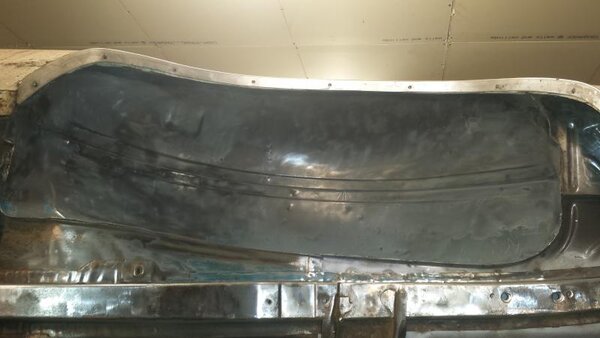
This last picture is of the trunk floor after it was plug welded in. I didn't have a picture of that on here before.
View attachment 18742
How did you do the drop offs? I need to do the same to my 73 (including the 70 tail panel)
 

tklockwood

Well-Known Member
Joined
Dec 17, 2014
Messages
88
Reaction score
9
Location
Corcoran, MN
Actually, I haven't done them yet. I thought I was going to have to do one of them but now it looks like both. I am not looking forward to it and will be starting soon. I am also using AMD lower patch panels to fix my quarters. I want to keep as much of the factory steel as possible. I have the patch panels and one trunk extension. I need to order the other. I will document my process as I do it. I think that cutting that lower part of the quarter off will give me more room to work on the trunk floor extensions. I plan to make a bracket that will hold the quarters and extensions in place while I weld them. I want to make sure they are in the right place so the rear valence fits correctly.

Are you doing anything with your quarters?
 

tklockwood

Well-Known Member
Joined
Dec 17, 2014
Messages
88
Reaction score
9
Location
Corcoran, MN
Looks great! Try one of these for the wheel wells, if you haven't already: http://www.acehardware.com/product/...287725&KPID=997221&kpid=997221&pla=pla_997221

With a cordless drill they are good for tight spots and are tough enough to remove the old paint & undercoating...

Keep the pics coming!


I actually have one of those but I am not sure where I bought it. It has been a long time. I like them but you have to be very careful with sharp stuff. They tend to self destruct if you are not careful, but you are right. They work very well to remove scale and paint.
 

clamcake

Well-Known Member
Joined
Jan 8, 2015
Messages
105
Reaction score
7
Location
Boston
I am about to do the exact same and have NO idea what I am doing. Can weld and have common sense but wonder if I can do it. I am doing Full quarters and filler as well. PM'd you
 

tklockwood

Well-Known Member
Joined
Dec 17, 2014
Messages
88
Reaction score
9
Location
Corcoran, MN
Mini update for 1/18/2015

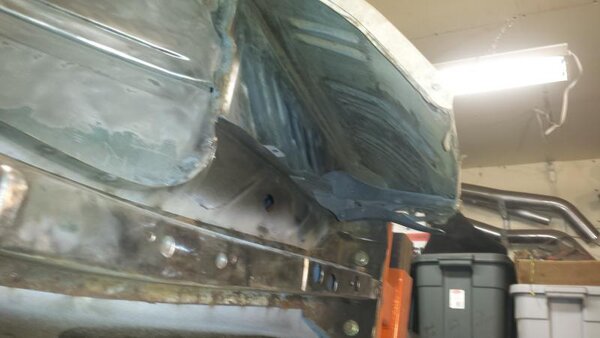
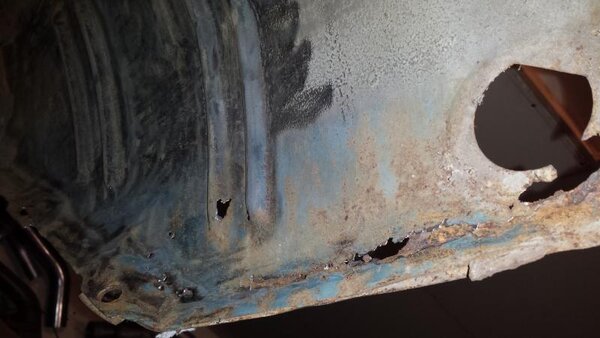
I have been taking pictures but have been remiss about posting them. These three were from 1/18. Just more cleaning up under the car. Heated and scraped the undercoating out of the left rear wheel well. Looks pretty good under the undercoating. One little section will need a patch, but overall it looks good. I also heated and scraped the undercoating from the inner rear quarter panel/trunk extension. Unfortunately, I uncovered a lot of pin hole rust on the extension on the lower area where it follows the quarter panel lines. I have since ordered the trunk extension for this side. Bummer.

20150118_170538.jpg20150118_170553.jpg20150118_170613.jpg

20150118_170538.jpg


20150118_170553.jpg


20150118_170613.jpg
 

tklockwood

Well-Known Member
Joined
Dec 17, 2014
Messages
88
Reaction score
9
Location
Corcoran, MN
Mini update for 1/25.

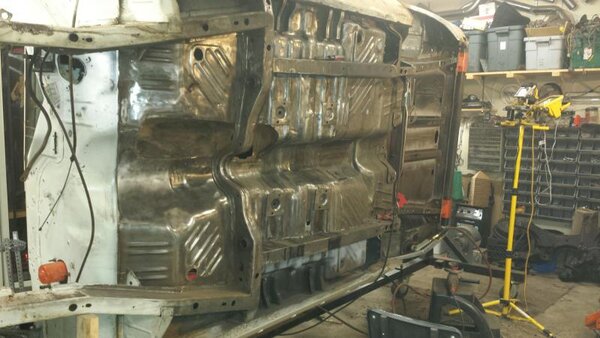
Another quick, late update. Honestly not much to see here. Floor gets shinier and shinier as I continue to labor on it. Very tiring. Very monotonous.

20150125_120818.jpg
20150125_120839.jpg
20150125_120844.jpg

20150125_120818.jpg


20150125_120839.jpg


20150125_120844.jpg
 

tklockwood

Well-Known Member
Joined
Dec 17, 2014
Messages
88
Reaction score
9
Location
Corcoran, MN
Update for 1/30

Ok. Not part of the project but I thought I would show the cool sign I got from the Dodge dealer not long ago. It is perfect because that is also the name of my wi-fi in my garage...
20150130_213125.jpg

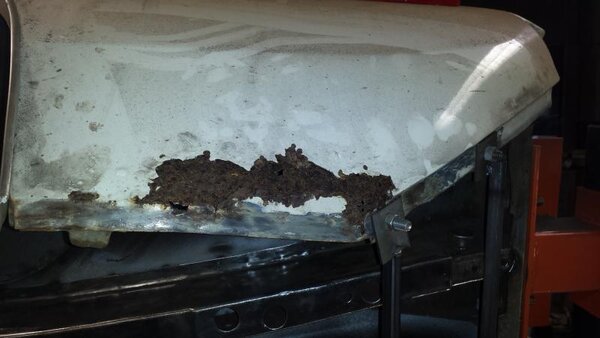
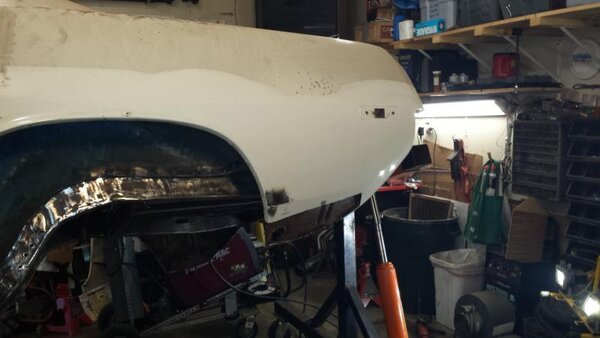
Ok. On to the real work. This is the left rear quarter. When I first built this car way back when this quarter panel was perfect. Not so much now. I actually found a 1/2 and 9/16 inch wrench behind this rusty area. I kind of wonder if that somehow caused this. Not sure. But I get to fix it.
20150131_144213.jpg

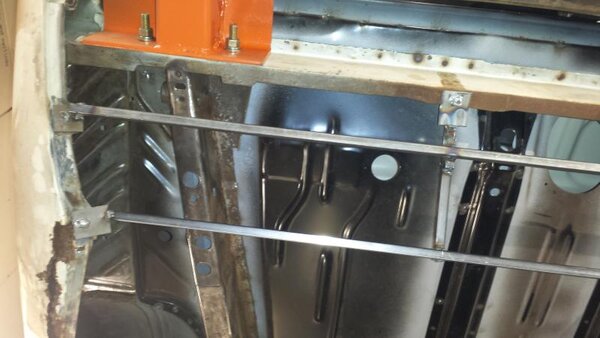
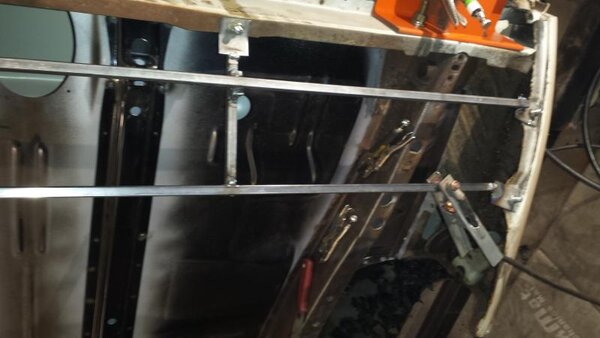
This is a tool I made to show where the quarter panels should sit. Right now the rear valence fits fine, so I figured I would make a tool to show where the holes for the rear valence should sit. I made tabs that bolted into the holes for the valence then welded square stock between them so I could later use it as a reference. It also bolts to a couple of holes in the rear panel as a reference. Overkill maybe, but I want this to turn out right.

20150131_144226.jpg20150131_144232.jpg

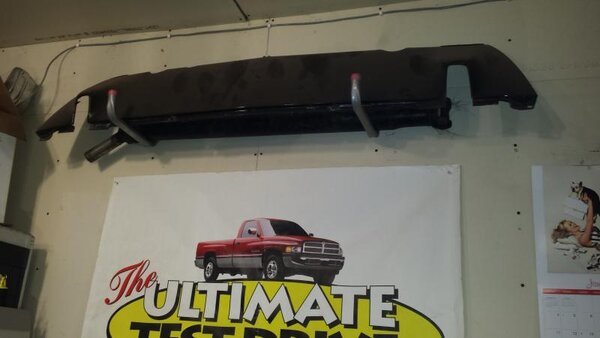
This is the rear valence I plan to use. I actually traded mine to someone several years ago because he wanted a less perfect one to modify. This one is pretty much perfect, but is black. Doesn't matter, I am painting the car anyway.

20150131_144300.jpg

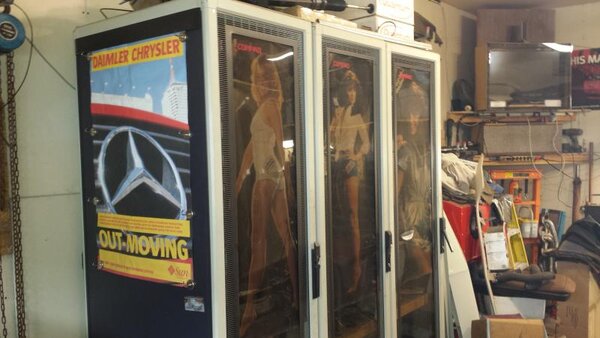
Another fun pic. This is three computer server racks bolted together that I use for storage. The front doors are smoked plexiglass so I put three of my Miss Direct Connection posters in the doors. Looks much better that way. Behind it you can see my television in the steel and plexiglass case I made for it to keep it clean. The case is screwed to the bottom cabinet of a Klipschorn speaker that I have on a shelf in the corner. The upper cabinet, with mid range and tweeter horns is on a shelf directly below it. Kind of upside down, but it works splendidly. These speakers are very efficient and can make an unbelievable amount of sound with very little power. Makes for a nice environment.
20150131_144320.jpg

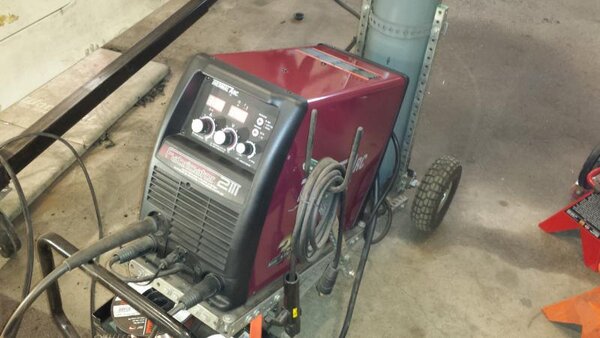
And here is my best friend of late. My Thermal Arc Fabricator 211i tri mode welder. This thing is awesome. Does mig, stick, and dc tig all in one welder. I have only used it for mig but I love this thing. They were recently re-branded Tweco, but it is still the same sweet welder, just black and yellow instead of red. I made the cart it is on. Turned out pretty nice.

20150131_144346.jpg

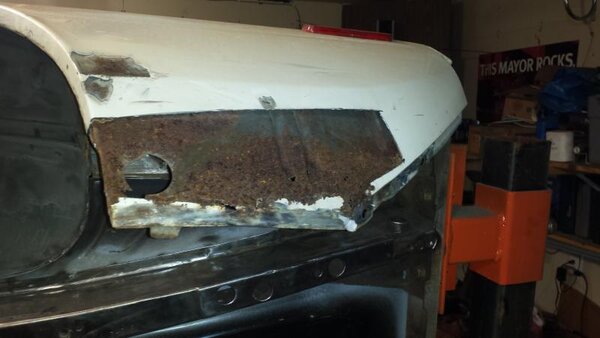
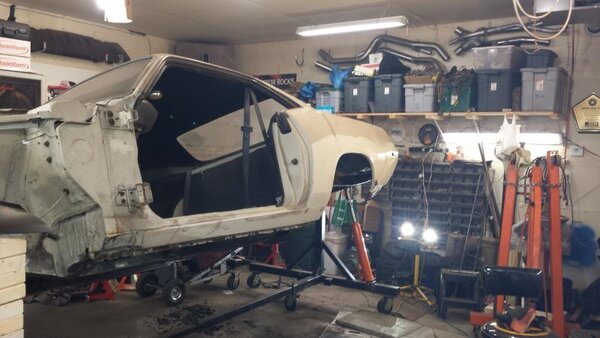
Ok. Back to the car. This is close up pics of the rusty area in the left rear quarter. You can see the little holes in the trunk extension and the rusty area that was hidden by the lower quarter panel. At this point, because the car was on its side, this area was like 7 feet in the air. Not an easy place to work on it. To get the car rotated to where it is took two of us, but my friend Dan hasn't been back in a while to help me rotate the car. Time to figure something else out...

20150131_153644.jpg
20150131_153701.jpg

20150130_213125.jpg


20150131_144213.jpg


20150131_144226.jpg


20150131_144232.jpg


20150131_144300.jpg


20150131_144320.jpg


20150131_144346.jpg


20150131_153644.jpg


20150131_153701.jpg
 

tklockwood

Well-Known Member
Joined
Dec 17, 2014
Messages
88
Reaction score
9
Location
Corcoran, MN
And finally an on time update. From today...

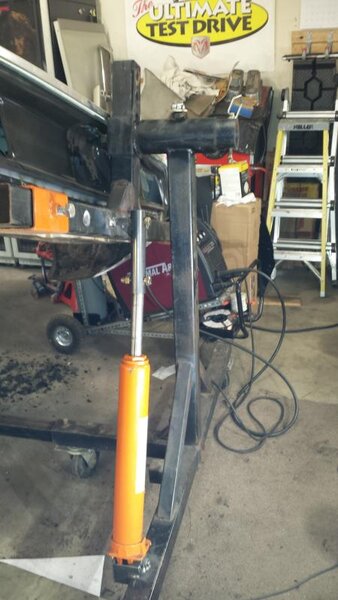
It was time to be able to rotate the car by myself. Because the mounts I made for the rotisserie are too high on the car it makes it pretty bottom heavy. Too late to re-create the mounts, they are holding the car up. So I took another approach. I made a mount on the bottom of one end of the rotisserie to hold the bottom of the ram from my engine hoist. It actually ended up being kind of an involved bracket that allows the ram to pivot as needed to follow the car on the rotisserie.
20150207_163719.jpg

I welded a couple of nuts to the cross piece of the rotisserie that the car is bolted to. I had to make a 9 inch extension to get the length I needed. I bolted the extension onto the ram and then bolted through the extension into the nut on the cross piece. Now I can rotate the car by extending the ram, or releasing it to let the car roll back down. This is so much better than it was. Now I can rotate the car to any position I want instead of just every 45 degrees. Then I can just tighten the jam nuts on each end of the rotisserie to hold it in place. It is awesome. Now I can get to work on the car because I can rotate it wherever I want to for the best accessibility.
20150207_163742.jpg

The previous pics are kind of hard to see but this last one kind of shows how it looks, and should make it clear what I did and how it works. Now tomorrow I can start on that quarter panel...
20150207_163758.jpg

20150207_163719.jpg


20150207_163758.jpg


20150207_163742.jpg
 

moparlee

Well-Known Member
Joined
Jul 25, 2011
Messages
2,925
Reaction score
1,227
Location
Mid Michigan
That's a great idea on using your engine lift ram to rotate the car. Like you said, can rotate the car to any position now by yourself. Nice job!
 

tklockwood

Well-Known Member
Joined
Dec 17, 2014
Messages
88
Reaction score
9
Location
Corcoran, MN
Finally working on the rear quarters.

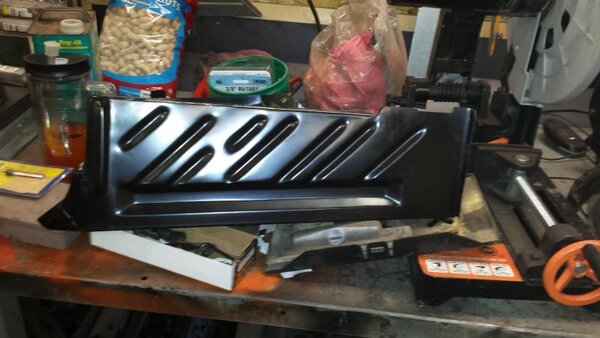
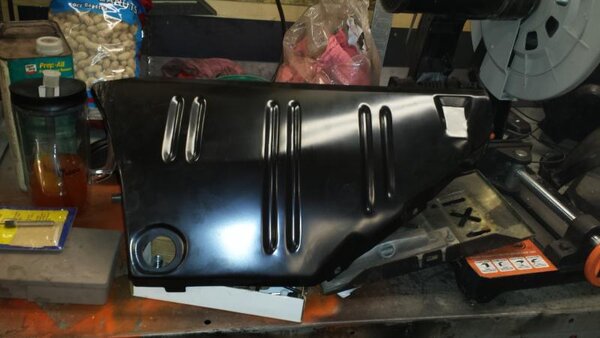
Got the lower part of the quarter panel cut off to allow me to remove the trunk extension. Below are top and side views of the new trunk extension. Looks like a pretty good reproduction to me. We shall see... Sorry for the mess on the bench.

2015-02-08 17.36.17.jpg2015-02-08 17.36.07.jpg

It was not easy to get the original trunk extension out, but I finally got it. All of the access is terrible. I drilled the spot welds where it was attached to the inner wheel house and lower quarter panel. When I replaced the trunk floor a while back I left the junction between the trunk floor and the old extension detached in case I decided to do this. So glad I did that. That saved me a bunch of work and a bunch of likely damage to my new trunk floor.

2015-02-08 17.35.49.jpg2015-02-08 17.35.33.jpg2015-02-08 17.35.25.jpg

I did briefly have the trunk extension in place but I removed it to drill holes to plug weld, and to coat it with weld through primer before I install it. It actually looks to fit pretty good, but I haven't used my home made tool to make sure the holes for the rear valence are in the right position. I think there is a good chance they are.

2015-02-08 17.21.47.jpg2015-02-08 17.21.29.jpg2015-02-08 17.21.21.jpg2015-02-08 17.21.12.jpg

By this point I was pretty exhausted and called it a day. More to come...

2015-02-08 17.36.17.jpg


2015-02-08 17.36.07.jpg


2015-02-08 17.35.49.jpg


2015-02-08 17.35.33.jpg


2015-02-08 17.35.25.jpg


2015-02-08 17.21.47.jpg


2015-02-08 17.21.29.jpg


2015-02-08 17.21.21.jpg


2015-02-08 17.21.12.jpg
 

tklockwood

Well-Known Member
Joined
Dec 17, 2014
Messages
88
Reaction score
9
Location
Corcoran, MN
Imagine how hard it would be laying on the floor underneath it rotisseries are great still looks like hard work though.

That is very true... I put the frame connectors in while the car was on its wheels while laying under it. It was decidedly not fun... But I think that particular task needed to be done that way to ensure the car was locked into the correct shape. As soon as that was done I was done being under there on my back. Well, until I put the car back together...
 
Back
Top