• Welcome to For E Bodies Only !

    We are a community of Plymouth Cuda and Dodge Challenger owners. Join now! Its Free!

71 RT Restoration

Kez

Well-Known Member
Joined
Apr 21, 2016
Messages
87
Reaction score
20
Location
San Luis Obispo, CA
Finally getting back to working on the car again, and a few things have been progressing without me. Body and paint work are done, and I will be bringing the car home this weekend if it is not raining. Jesus did a great job matching the paint exactly as left the factory. The engine is ready for dyno testing, too, and I will be witnessing that next Tuesday. Hopefully we can start putting this back together soon!

121716 Assembly Complete.jpg


IMG_3153.JPG


IMG_3154.JPG


IMG_3156.JPG
 

Kez

Well-Known Member
Joined
Apr 21, 2016
Messages
87
Reaction score
20
Location
San Luis Obispo, CA
One question on wheels - my build sheet says "W23" which is listed in the Red Book at chrome style road wheels 14 inch with standard spare. I am assuming standard means full size, but would that also be a road wheel, or other? Some have told me that all the RTs came with space saver tires, but it does not appear to be the case. Any advice or other sources to check?
 

autoxcuda

Well-Known Member
Joined
Apr 16, 2016
Messages
67
Reaction score
13
Location
Los Angeles
W23 is 14" magnum 500 with trim rings. Same as on my 71 rt

R/t's did not all come standard with collapsible rear tire.
 

autoxcuda

Well-Known Member
Joined
Apr 16, 2016
Messages
67
Reaction score
13
Location
Los Angeles
Im pretty sure spare would be black rim. Not sure of size or rim type.

Maybe someone else can confirm black spare.
 

Kez

Well-Known Member
Joined
Apr 21, 2016
Messages
87
Reaction score
20
Location
San Luis Obispo, CA
IMG_3158.JPG
Been a while since I have posted - been spending spare time dealing with rain issues, power outages, well pumps, etc. Car body is back from the body shop and ready to go - some assembly required!
IMG_3245.JPG

The engine is back from QMP racing, they did a GREAT job, and I am very happy with the build. Working now on finishing the K-frame assembly so I can get the driveline installed and off the floor. But first I have to figure out why the power is dead to the shop - always something!
 

Moparz10

Member
Joined
Oct 5, 2015
Messages
19
Reaction score
0
Location
California
Same here kids done with college and car just sat but i'm back on it now for the past 2 years,never ending
 

EV2-70

Active Member
Joined
Jun 22, 2016
Messages
29
Reaction score
8
Great Car project. How long did it take to get to this point in the restoration? I'm finishing mine and it has been a year and a half.
 

Kez

Well-Known Member
Joined
Apr 21, 2016
Messages
87
Reaction score
20
Location
San Luis Obispo, CA
Great Car project. How long did it take to get to this point in the restoration? I'm finishing mine and it has been a year and a half.

Thanks, I have been working on it for a year and half myself, but have had some serious setbacks, and some periods (like right now) where I have not been able to spend any time working on it! Have you posted pics and info on your restoration, can you point me to the thread?
 

EV2-70

Active Member
Joined
Jun 22, 2016
Messages
29
Reaction score
8
I haven't gotten to doing that yet. But here are a few photos.

20170405_141530.jpg


20170405_141555.jpg


20170414_115531.jpg
 

1969VADart

Well-Known Member
Joined
Apr 15, 2017
Messages
157
Reaction score
25
Location
Fredericksburg, VA
What an excellent build. I am just getting started on mine but this helps motivate me to see what a finished product (or almost finished) can look like.
 
Last edited:

EV2-70

Active Member
Joined
Jun 22, 2016
Messages
29
Reaction score
8
Thanks, it takes a lot of time, money and motivation.
 

340challconvert

Well-Known Member
Joined
Feb 13, 2011
Messages
5,196
Reaction score
2,737
Location
Parsippany, NJ
Nice work on both of the cars.
Kez congrats on getting it done so quickly.
It is definitely a labor of love to work on these old Challengers.

Dino2 (1).gif
 

Kez

Well-Known Member
Joined
Apr 21, 2016
Messages
87
Reaction score
20
Location
San Luis Obispo, CA
Well, I have been Missing in Action for almost 5 years now - between a job that was killing me, house projects that needed to be done, and family issues with Covid, it has not been possible to spend any time on my car so it just sat. I got laid off in June due to Covid budget cuts, but figured out I have the resources to just retire 2 years early - which is great but may crimp my car budget a bit.

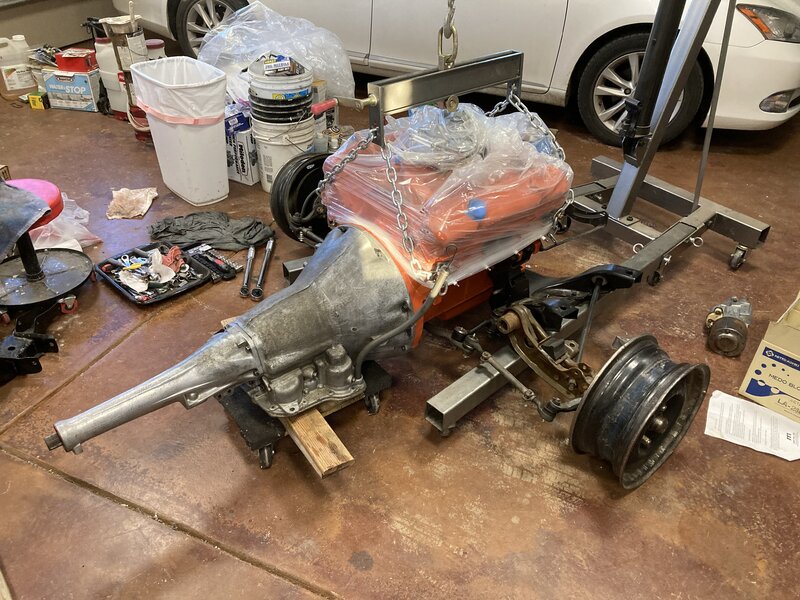
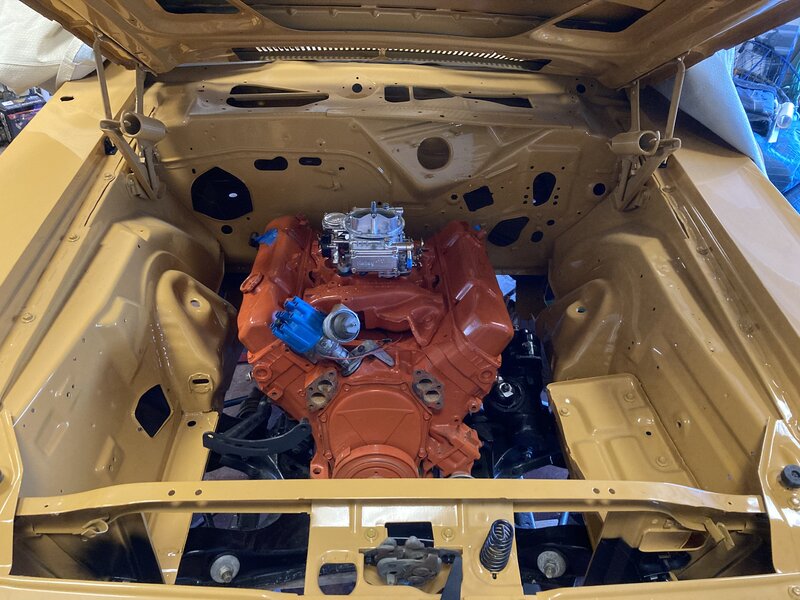
So after completing a few more things, I am not getting back to the Challenger, and glad to report that the engine and transmission are mounted to the rebuilt K-frame. I placed all of that onto the legs of my engine hoist and one 4 wheel furniture dolly under the tranny, then used the hoist to lift the car from the bumper brackets - up and over the motor, moving it a foot at a time, and shortening the hoist arm length after each lift. I originally thought I would need 4 good friends to help with the effort but was able to complete the job by myself in one afternoon. Once the car was in proper position, I removed the castor wheels from the car body, extended the hoist arm again and connected the hoist to the front of the engine. Placed a floor jack under the tranny mount to lift the assembly into place and with a little nudging got the K-frame bolts lined up and installed. VERY happy this is done and now I can start the other 95% of assembly!!
 

Attachments

  • image_67175425.JPG
    image_67175425.JPG
    1.4 MB · Views: 181

Kez

Well-Known Member
Joined
Apr 21, 2016
Messages
87
Reaction score
20
Location
San Luis Obispo, CA
Pic of the subframe - will install the upper a arms now that the K-frame is in the car.
 

Attachments

  • image_50738433.JPG
    image_50738433.JPG
    1.3 MB · Views: 171
  • image_50458369.JPG
    image_50458369.JPG
    974.8 KB · Views: 184
Back
Top