
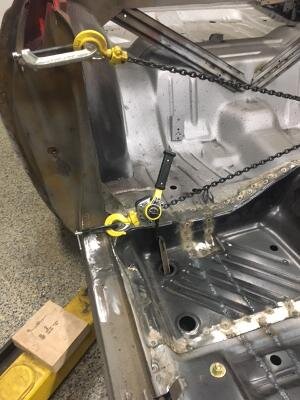
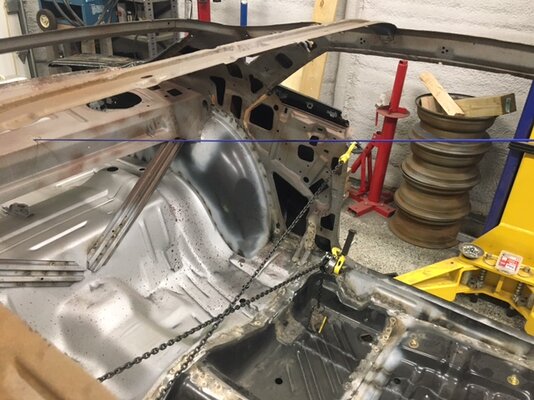
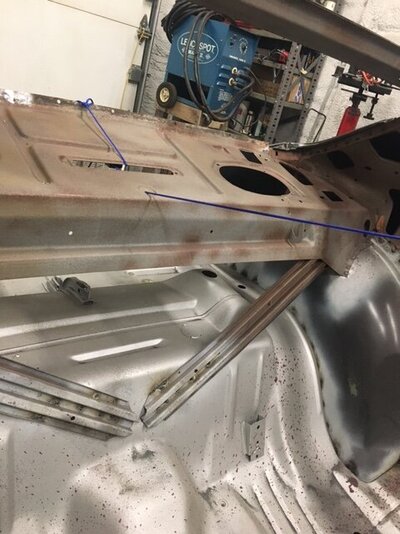
Finished the Frame connectors, not really pretty with a flux core welder but not bad. I have been jumping around a bit with this resto but I try to work on things that I have time to finish. I made sure to weld in bracing before I started disassembling all the sheet metal. What I found was since my car was hit pretty badly that most new sheet metal required that I remove the bracing at times to achieve the dimensions that this website and the original manual have documented as correct. So far so good, till now. I figured I would install the jack brackets in the drivers side trunk extension. I needed the quarter panel installed on that side to make sure there was no interference issues. I have test fitted both quarters at least 10 times in the past, each time less and less issues until perfect. This time the quarter didn't fit at all, I was very discouraged. After a little measuring it seems that the top of the door pillars have "splayed". I should have left the bracing in place. I was able to correct for the problem, it required a little force and a couple of old chain falls. Once I got things back in line the quarter dropped right into place. I am very out of my wheelhouse with bodywork. I am looking forward to when I am working on the drive line.
You are using an out of date browser. It may not display this or other websites correctly.
You should upgrade or use an alternative browser.
You should upgrade or use an alternative browser.
73 Cuda rust bucket, too far gone, but why not.
- Thread starter Quiny
- Start date
Challenger RTA
Well-Known Member
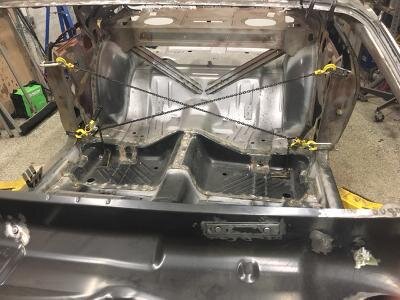
Looks like your roof structure is intact. there is a notch on the front and rear of the roof.put a string line on the rear shelf hole and pull to the center of the core support.This a good reference point to check from. with the car level by checking off the top of the rockers.with a 6' level and a piece of 2x4 on the rockers. check your level with an other level that their reading the same also turn 180 to check. with string line pulled drop a plumb bob from the notch to string line you will see what might good or be out. You may have already established it.


Last edited:
That was some great advice! I pulled I piece of blue paracord very tight and got a great center line. I was able to get the dimensions perfect. Thanks again.Looks like your roof structure is intact. there is a notch on the front and rear of the roof.put a string line on the rear shelf hole and pull to the center of the core support.This a good reference point to check from. with the car level by checking off the top of the rockers.with a 6' level and a piece of 2x4 on the rockers. check your level with an other level that their reading the same also turn 180 to check. with string line pulled drop a plumb bob from the notch to string line you will see what might good or be out. You may have already established it.
View attachment 97172
View attachment 97173
Attachments
Challenger RTA
Well-Known Member
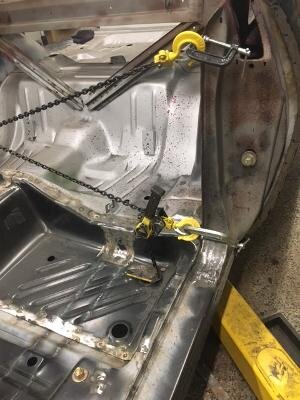
Think 3D. You also can pull a string font to back.bottom of core support to rear bumper panel. use center of k frame hole as a point. or put a nail on your jig.quick and cheap and easy to apply. I use masonry sting strong and thin. Or buy a laser level for other applications. A cheap one would be fine. a straight line is a straight line.


Last edited:
Thanks for all the help with the centerline measurements, it really helped a lot. I have not had a lot of time to work on the car but I did have enough time to test the fit the quarters and the dutchman panel (under the rear glass) . I ordered the roof skin with both front fenders in the hopes that the packaging would protect the sheet metal from getting damaged. It seemed to work because there were no dents in the AMD roof skin. The quarters, dutchman and roof, fit really well with very little adjustment. I did not weld anything in place yet but it seems that the AMD stuff is pretty good. I still need to fit the drip rails, I think that will go well. I am still 3 - 4 years away from completion but it seems closer with the nice fit of everything.


So I am going with the Vintage Air solution for heat and AC. Since it is months to receive an order, I figured I would look at the instructions. I made a block off for the right side air intake. I didn't want it to fill with rain water that would never be drained.


Test fitting the roof skin, on and off about 4 times now. Front and rear seam are very good. I was having trouble with the drip rails. I couldn't get the gaps even, I needed to flex the front drip rail more than it would allow. I ended up putting a perpendicular slit about every 2 inches along the mounting surface. That seemed to make all the difference.


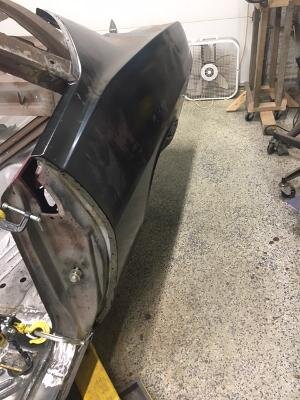
I figured I would weld the rear quarters permanently in this morning. I was about to start welding when I remembered reading in these forums to always check door gaps and alignment before welding the quarter in permanent. I haven't had the doors on since I removed them a year ago. Door alignment, style lines and gaps look pretty good. I think I will leave the door pillar seam un-welded just in case I need to make minor changes. There is one small area that might need tweaking.


gzig5
Well-Known Member
Looking good!
Well it's been a few years since I updated this build. Like most people life gets in the way of a good project. I have done a little here and there. I will get some pics out soon. At this point all the rusted sheet metal has been cut out and replaced. The 5.7 Hemi from and old 2013 Chrysler 300 has been installed. The 4L60E has been installed. The engine bay and underside of the car has been sealed and painted. The rear end rebuilt and installed. Custom drive shaft made and installed. Using the Hemi harness and the Compusport tranny computer I did manage start up the engine and check all the pressures and fluids. So far so good. It is slow going. Good news is I can at least move the car in and out of the garage.
Anyone know if these are important? They are thin plates that mount on the bumper brackets, it looks like there should be 4 but like everything else on this car one is missing. I realize I can just omit them but do they serve a purpose? This car will never be a show car, it will be a regular driver. I'm not worried about the car being restored properly.


Chryco Psycho
Well-Known Member
I have never seen those plates used on the bumper brackets
Strange, they seem to be made for it, even the square cut outs that the tabs go into look factory made. If I had all 4 I would use them but I only have 3. It does show them on the parts manual. Part# 2931 349.I have never seen those plates used on the bumper brackets
gzig5
Well-Known Member
You are a lot further along than I am. Mine still looks pretty much like the pic in post #5. BUT, I am hoping that I'll be able to focus on it pretty much full time in a couple weeks and get all the major body work done before the snow flies. I did manage to get the 340 rebuilt. I was going to put a 4" crank in it but changed my mind and built a 10.7:1 stock stroke 340 with ProMaxx heads and a 242/247 solid flat tappet .580" lift cam. Netted 460hp/440lb-ft on the dyno with the wrong rockers and no tuning. It should have a bit more in it, judging by the chart. That's got my juices flowing again.Well it's been a few years since I updated this build. Like most people life gets in the way of a good project. I have done a little here and there. I will get some pics out soon. At this point all the rusted sheet metal has been cut out and replaced. The 5.7 Hemi from and old 2013 Chrysler 300 has been installed. The 4L60E has been installed. The engine bay and underside of the car has been sealed and painted. The rear end rebuilt and installed. Custom drive shaft made and installed. Using the Hemi harness and the Compusport tranny computer I did manage start up the engine and check all the pressures and fluids. So far so good. It is slow going. Good news is I can at least move the car in and out of the garage.
Good to see you are getting close.
Similar threads
- Locked
- Replies
- 0
- Views
- 261
- Replies
- 27
- Views
- 1K


